
Project Templates Business
Project Templates help you standardize your workflow by providing reusable structures for common project types. Instead of manually configuring similar projects from scratch, templates allow you to quickly apply predefined settings, saving time and keeping projects consistent across your workspace.
Templates are useful for teams who:
- Launch similar projects on a regular basis
- Need to maintain consistency across multiple projects
- Want to reduce setup time for new projects
- Need all projects to follow team standards and best practices
What a template captures
A project template stores everything the create-project form asks for, plus the project's structure:
| Part of the project | What the template holds |
|---|---|
| Basics | Name, description, network (Public or Private), project lead, default assignee, logo, cover image and timezone. |
| Properties | Priority, start and target dates, and project state, when project states are on. |
| Features | Which features are on: cycles, modules, views, pages, intake, time tracking, work item types, project updates, epics, workflows and milestones. A template starts with cycles, modules, views and pages on and the rest off. |
| Automations | The auto-archive and auto-close periods. |
| Work structure | Work item states, labels, workflows, estimates, work item types and epics. |
| Content | Members, intake settings, milestones, modules, recurring work items, automations and starter work items. |
Create project template
Navigate to Workspace Settings.
Select the Templates tab on the right pane.
Click the Create template button in the top-right corner.
Select Project template from the options.
Fill in the template details:
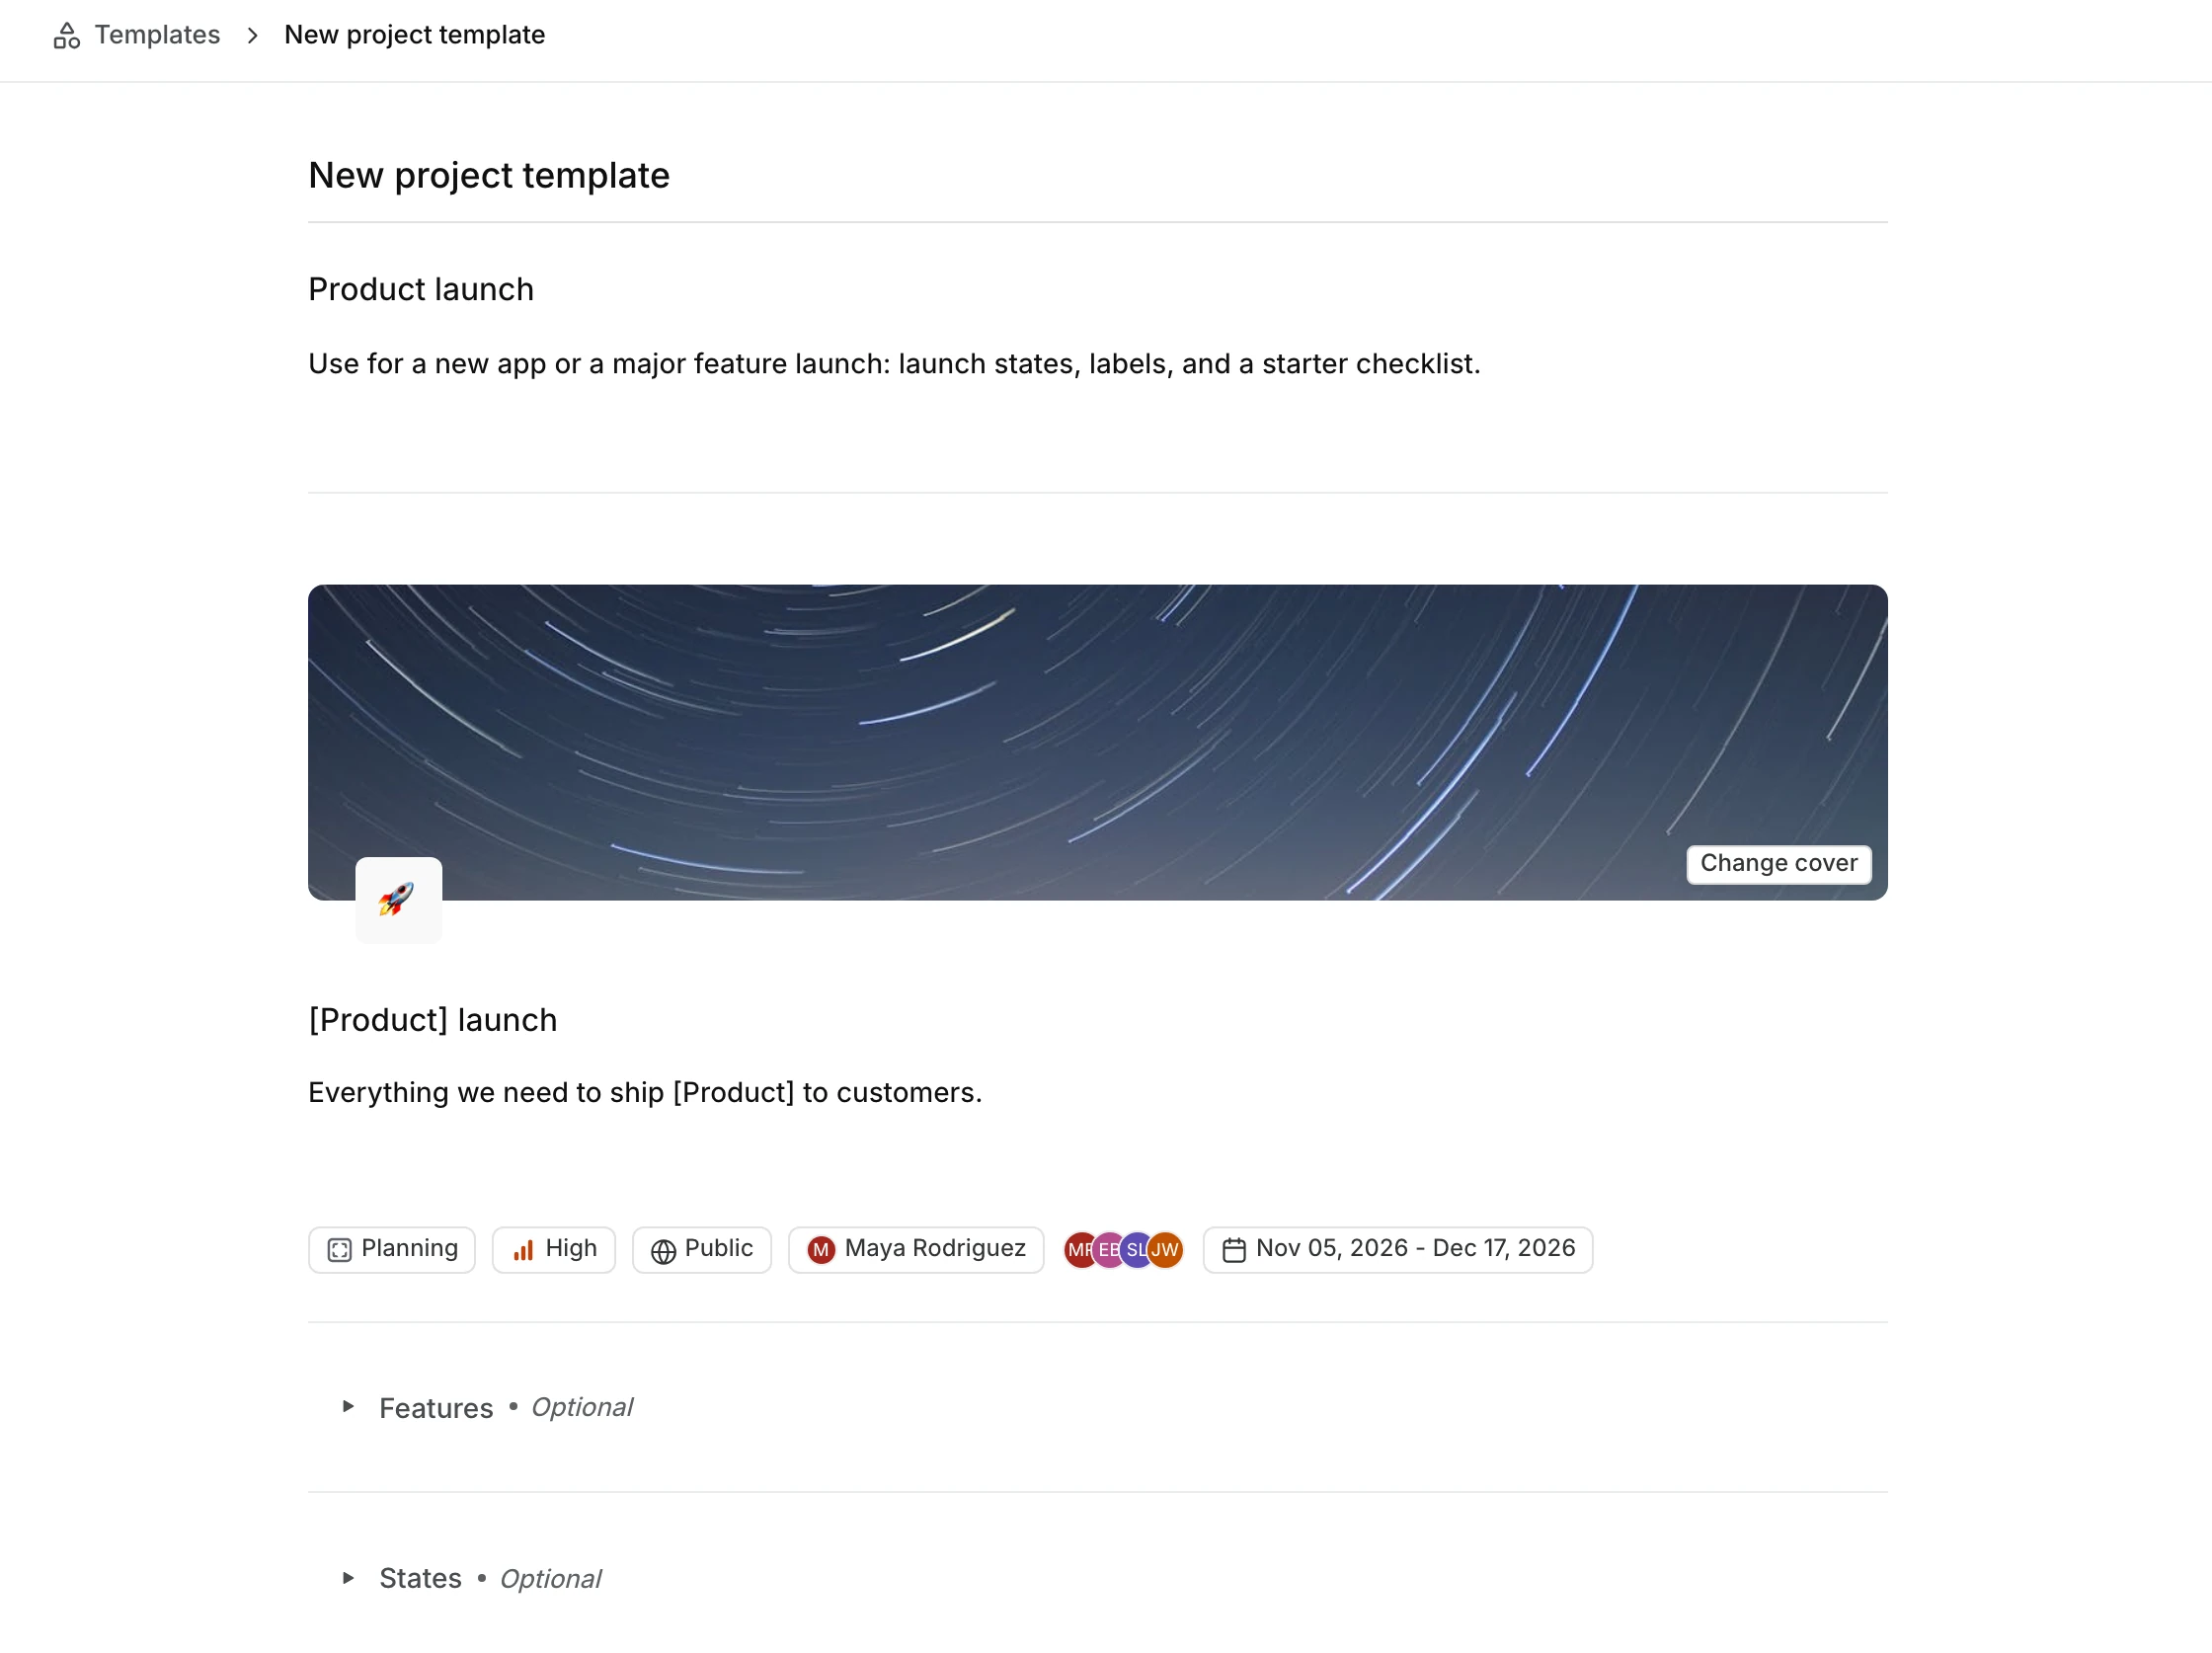
Give your template a clear, descriptive name. The field reads "Name your project template." and the name is required.
Add a description explaining when and how to use this template.
Upload a cover image that represents the template.
Name the project the template creates ("Name your project.") and describe its purpose and goals.
Configure project properties like visibility, lead, and dates. State and priority appear when project states are on.
Set up optional features like States, Labels, Modules, and Work item types.
You can optionally define initial work items that will automatically create when teams start new projects, helping them get up and running faster with pre-structured tasks.
Click Create project template to save.
To change a template later, open it from the list and click Update project template.
Use project templates
Once you've created templates, you can use them whenever you create a new project. Anyone who can create a project can use a template.
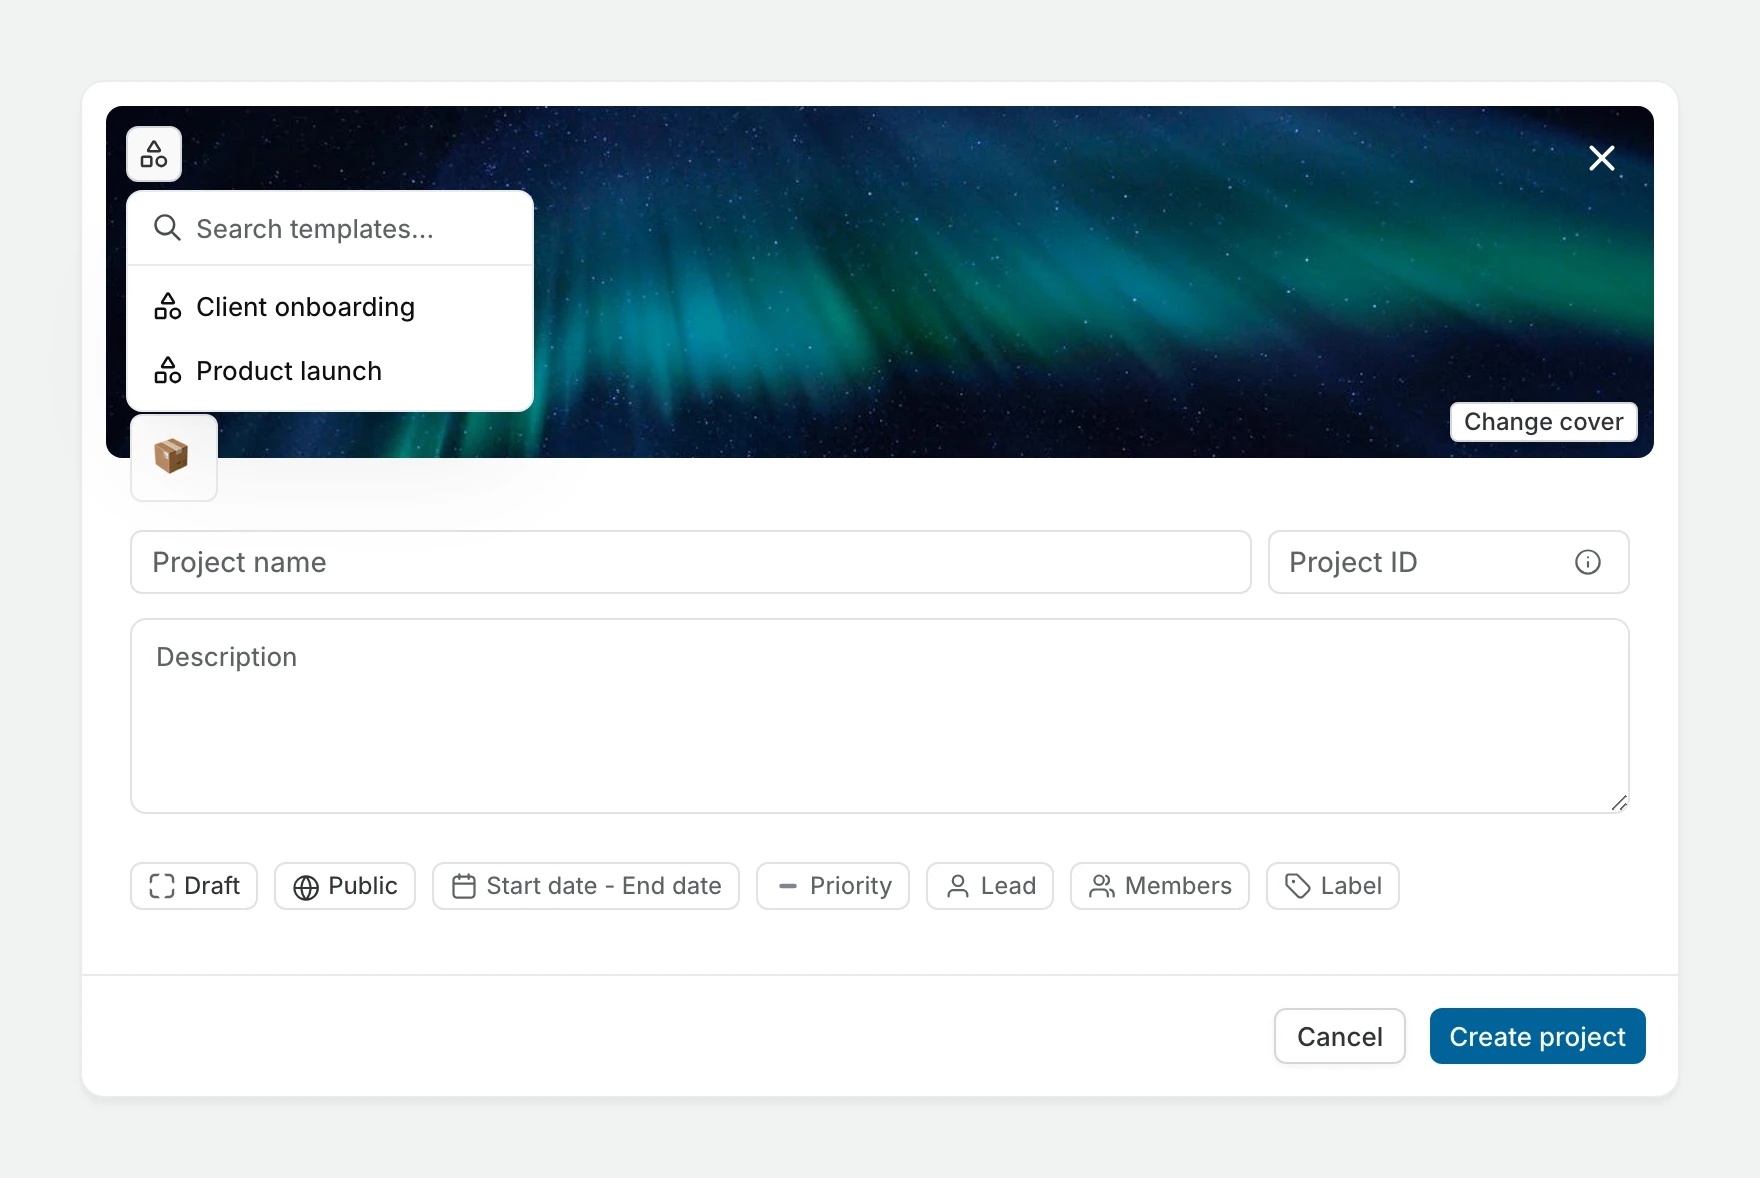
- Navigate to Work on the siderail, then click the + button next to Projects in the sidebar.
- Select Pick a project template on the top-left corner of the modal. If you have none yet, the list reads "No templates found." with an Add new template link.
- Choose from available templates.
- Your new project will be pre-configured with all the template settings.
- Make any necessary adjustments to customize the project.
- Click Create project.
Plane creates the project, applies the template's states, features, project state and intake settings, and then copies the starter work items, labels, estimates and the rest in the background. You become the project's admin, and so does the template's lead if that's someone else.
Alternatively, from the Templates settings page:
- Find your template in the list.
- Click the Use template button.
- This will immediately open the new project creation form with all template settings pre-filled.
Manage templates
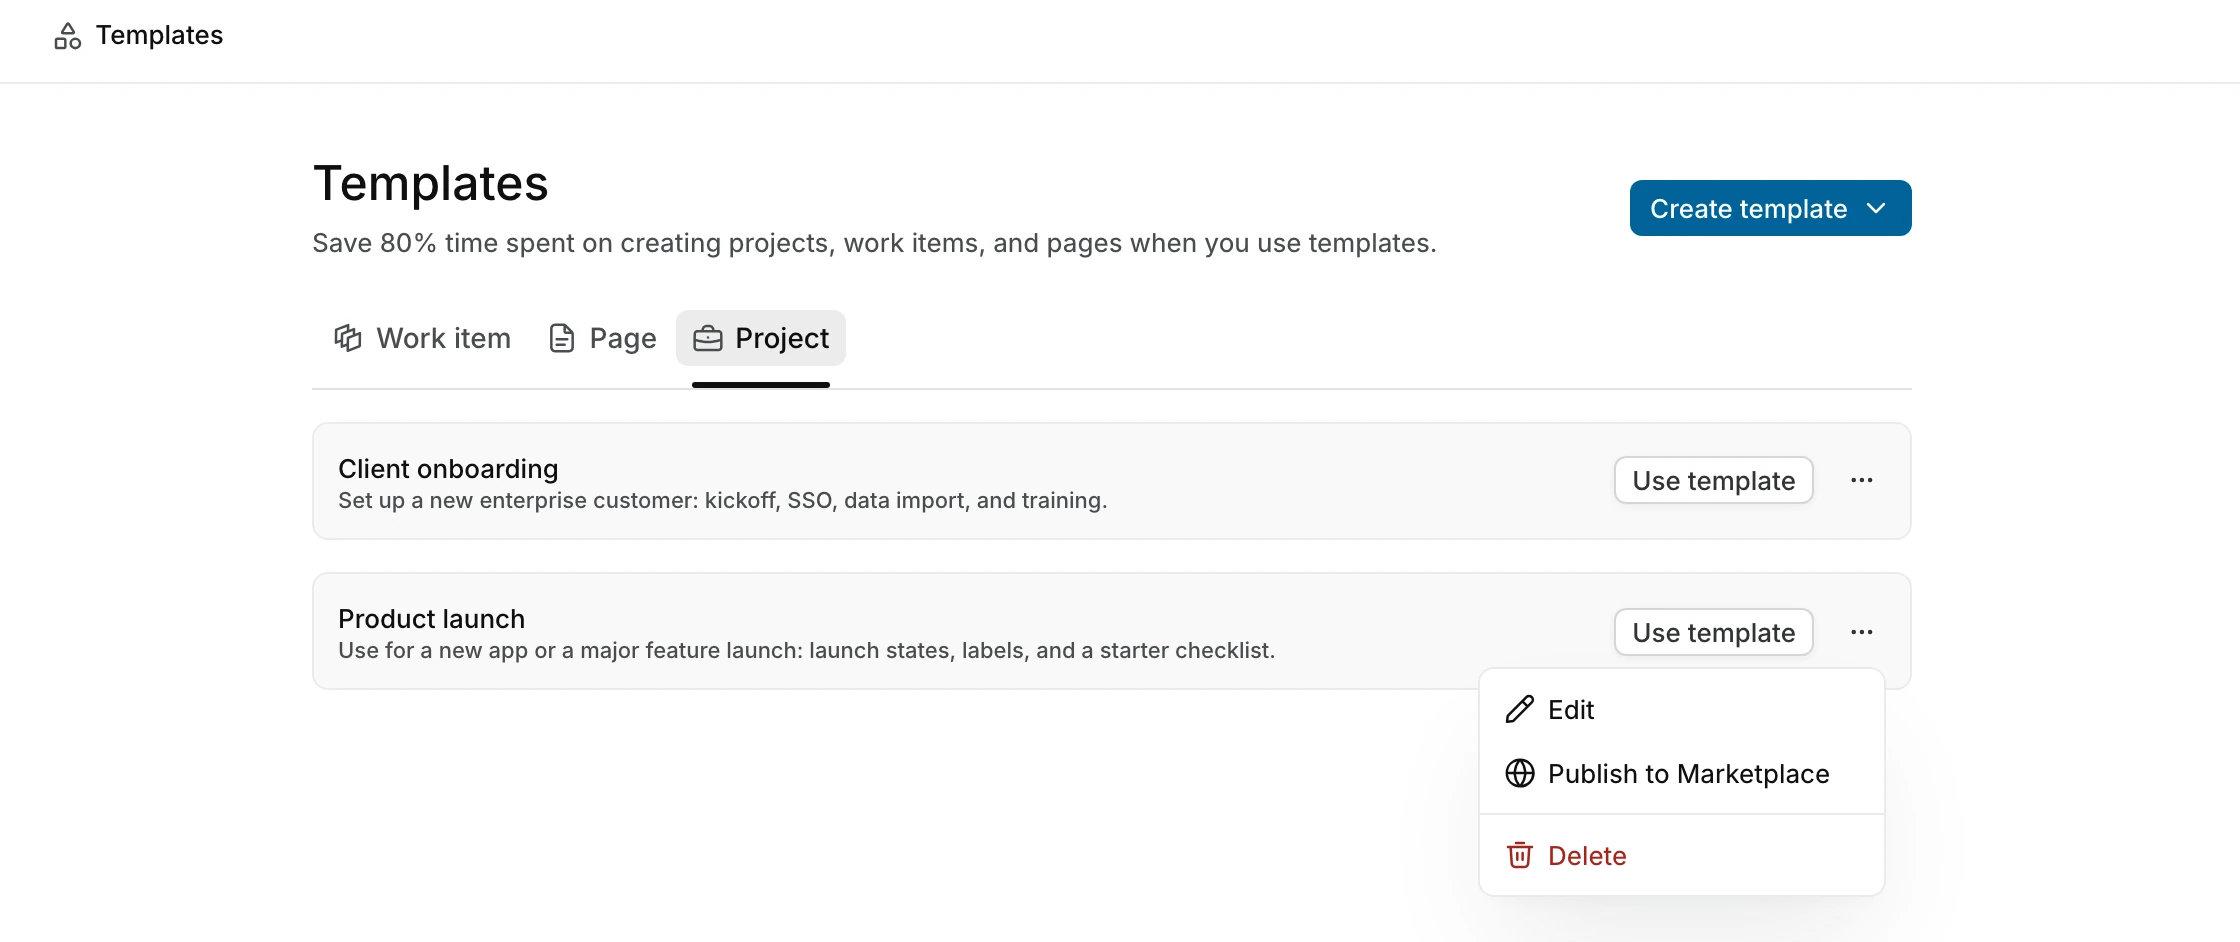
All your templates are accessible from Workspace Settings > Templates.
From here you can:
- View all existing templates
- Create new templates
- Use existing templates
- Edit or delete templates
Where it's available, a template's menu also offers Publish to Marketplace, so other workspaces can use it.