

Create and manage work items
This page covers the life of a work item from the outside: getting it into Plane, copying it, and taking it out again by archiving or deleting it. To work inside a single work item, see Work item details.
Role
To create, edit, copy, and archive work items, you need the Admin or Contributor role in the project. Contributors can delete only the work items they created.
Create a work item
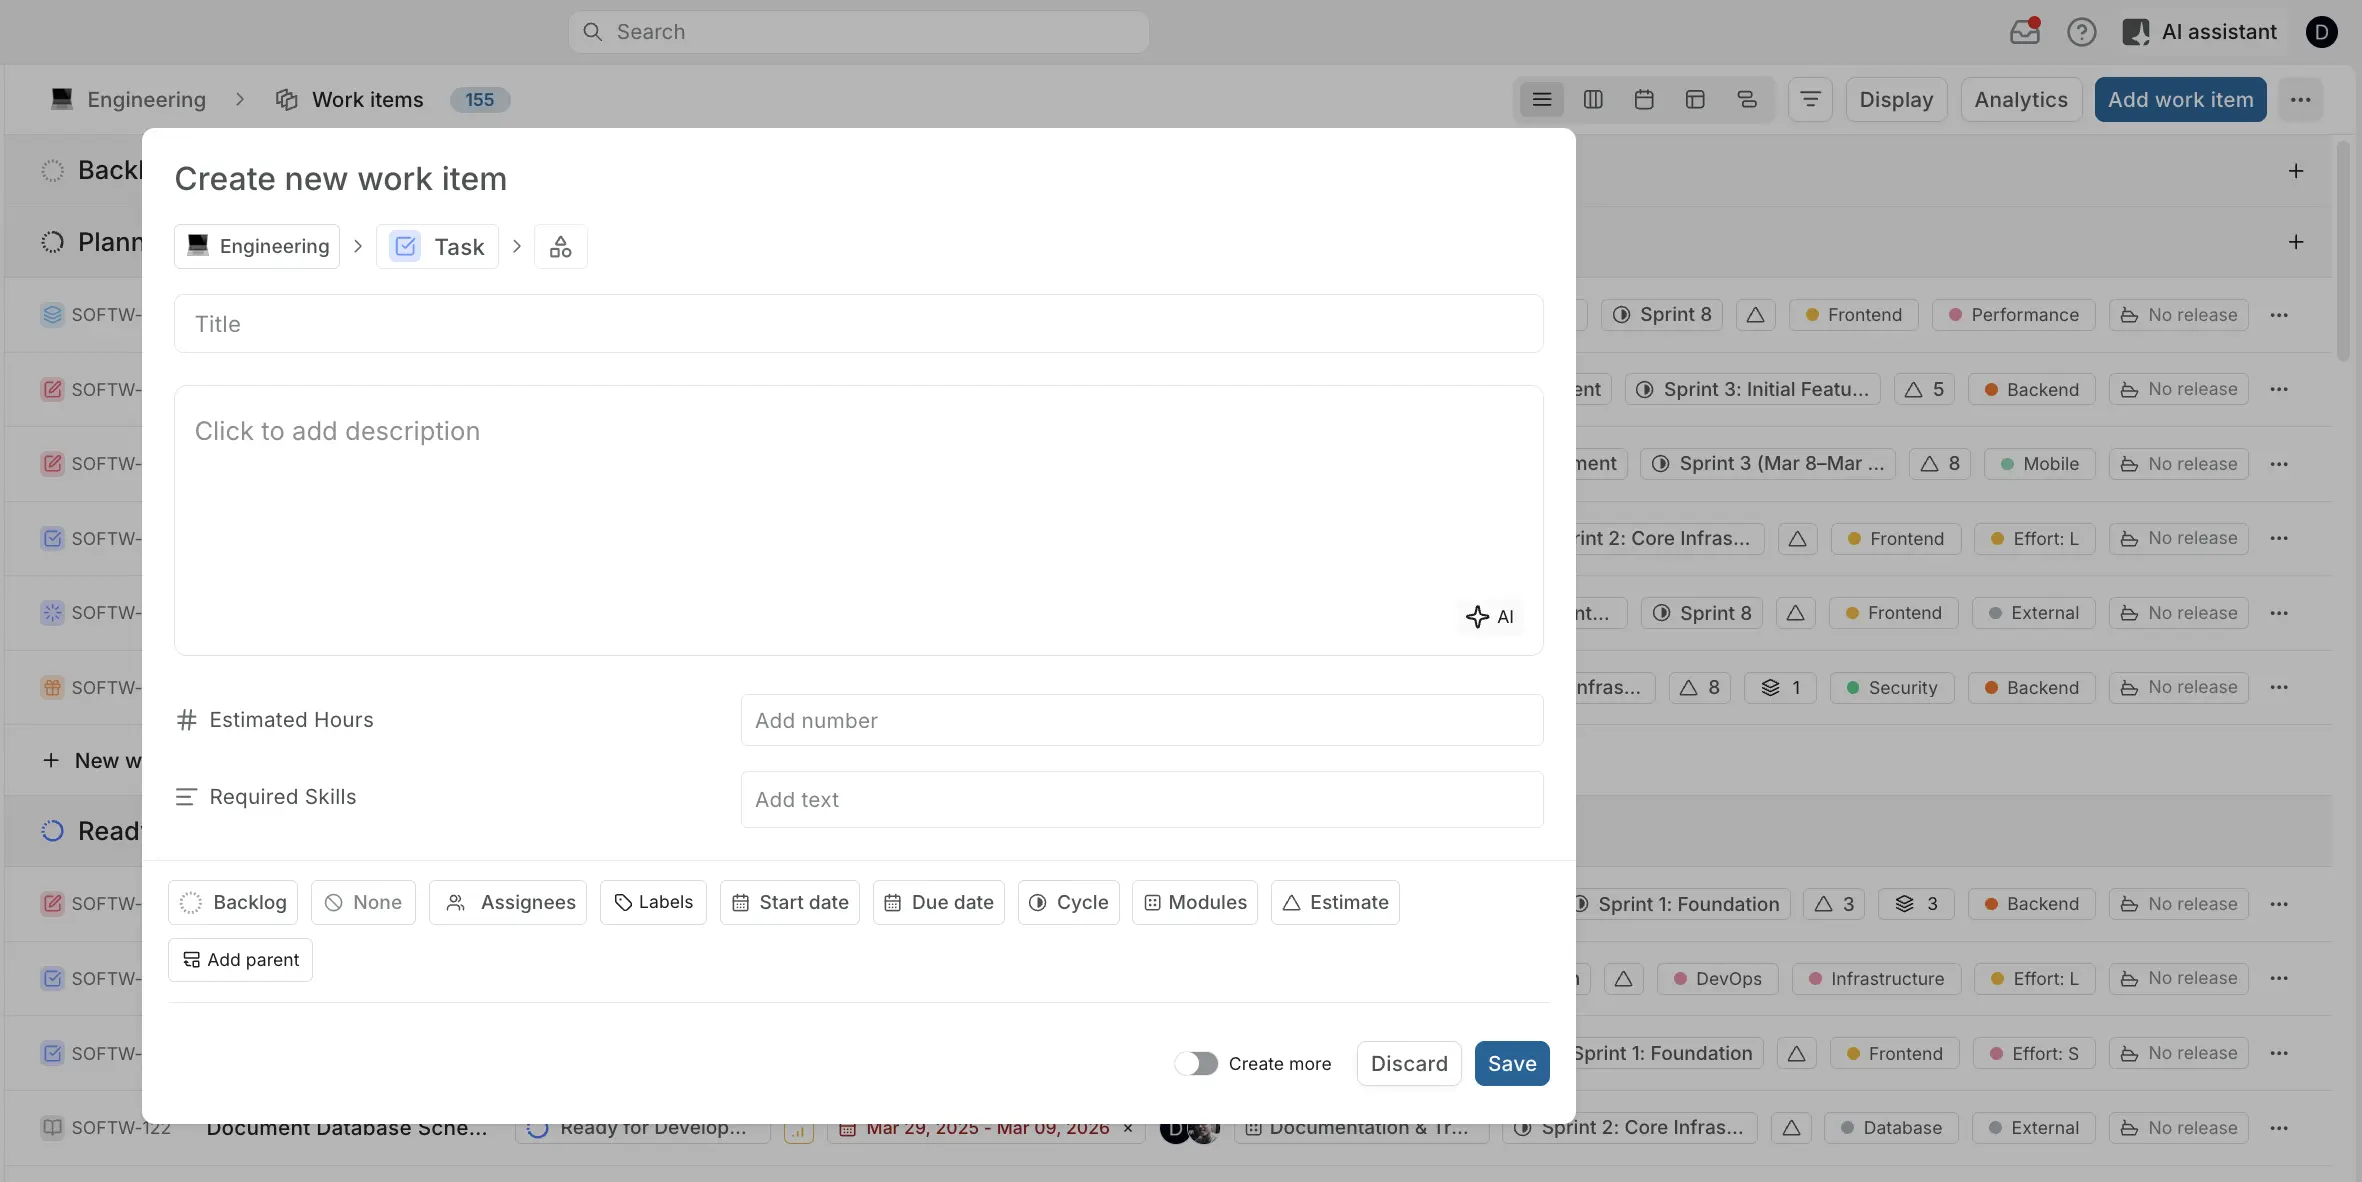
- Open the create modal in any of these ways:
- Press
NthenIfrom anywhere in Plane. - Open a project, click Work items in the sidebar, then click Add work item at the top right.
- Press
- Check the project at the top left. Plane picks the project you're in, or the one you visited last.
- Choose a work item type if the project has more than one. The project's default type is selected.
- To start from a saved layout, choose a work item template. The template fills in the title, description, and properties, and you can change any of them.
- Enter a title. The title is required and can be up to 255 characters.
- Add a description and set properties such as state, priority, assignees, labels, dates, cycle, modules, estimate, and parent. If the type has custom properties, they appear below the description. Mandatory custom properties must be filled in before you can save.
- Click Save.
Plane creates the work item and gives it the next ID in the project, such as WEB-143. A confirmation appears at the bottom of the screen with a link to open it.
TIP
To create several work items one after another, turn on Create more before you click Save. The modal clears and stays open for the next one.
Save a work item as a draft
If you close the create modal after typing something, Plane asks Save this draft?
- Click Save to keep what you wrote in Drafts. Drafts are private to you until you move them into a project.
- Click Discard to close the modal and lose what you wrote.
- Click Cancel to go back to the modal.
Quick add a work item
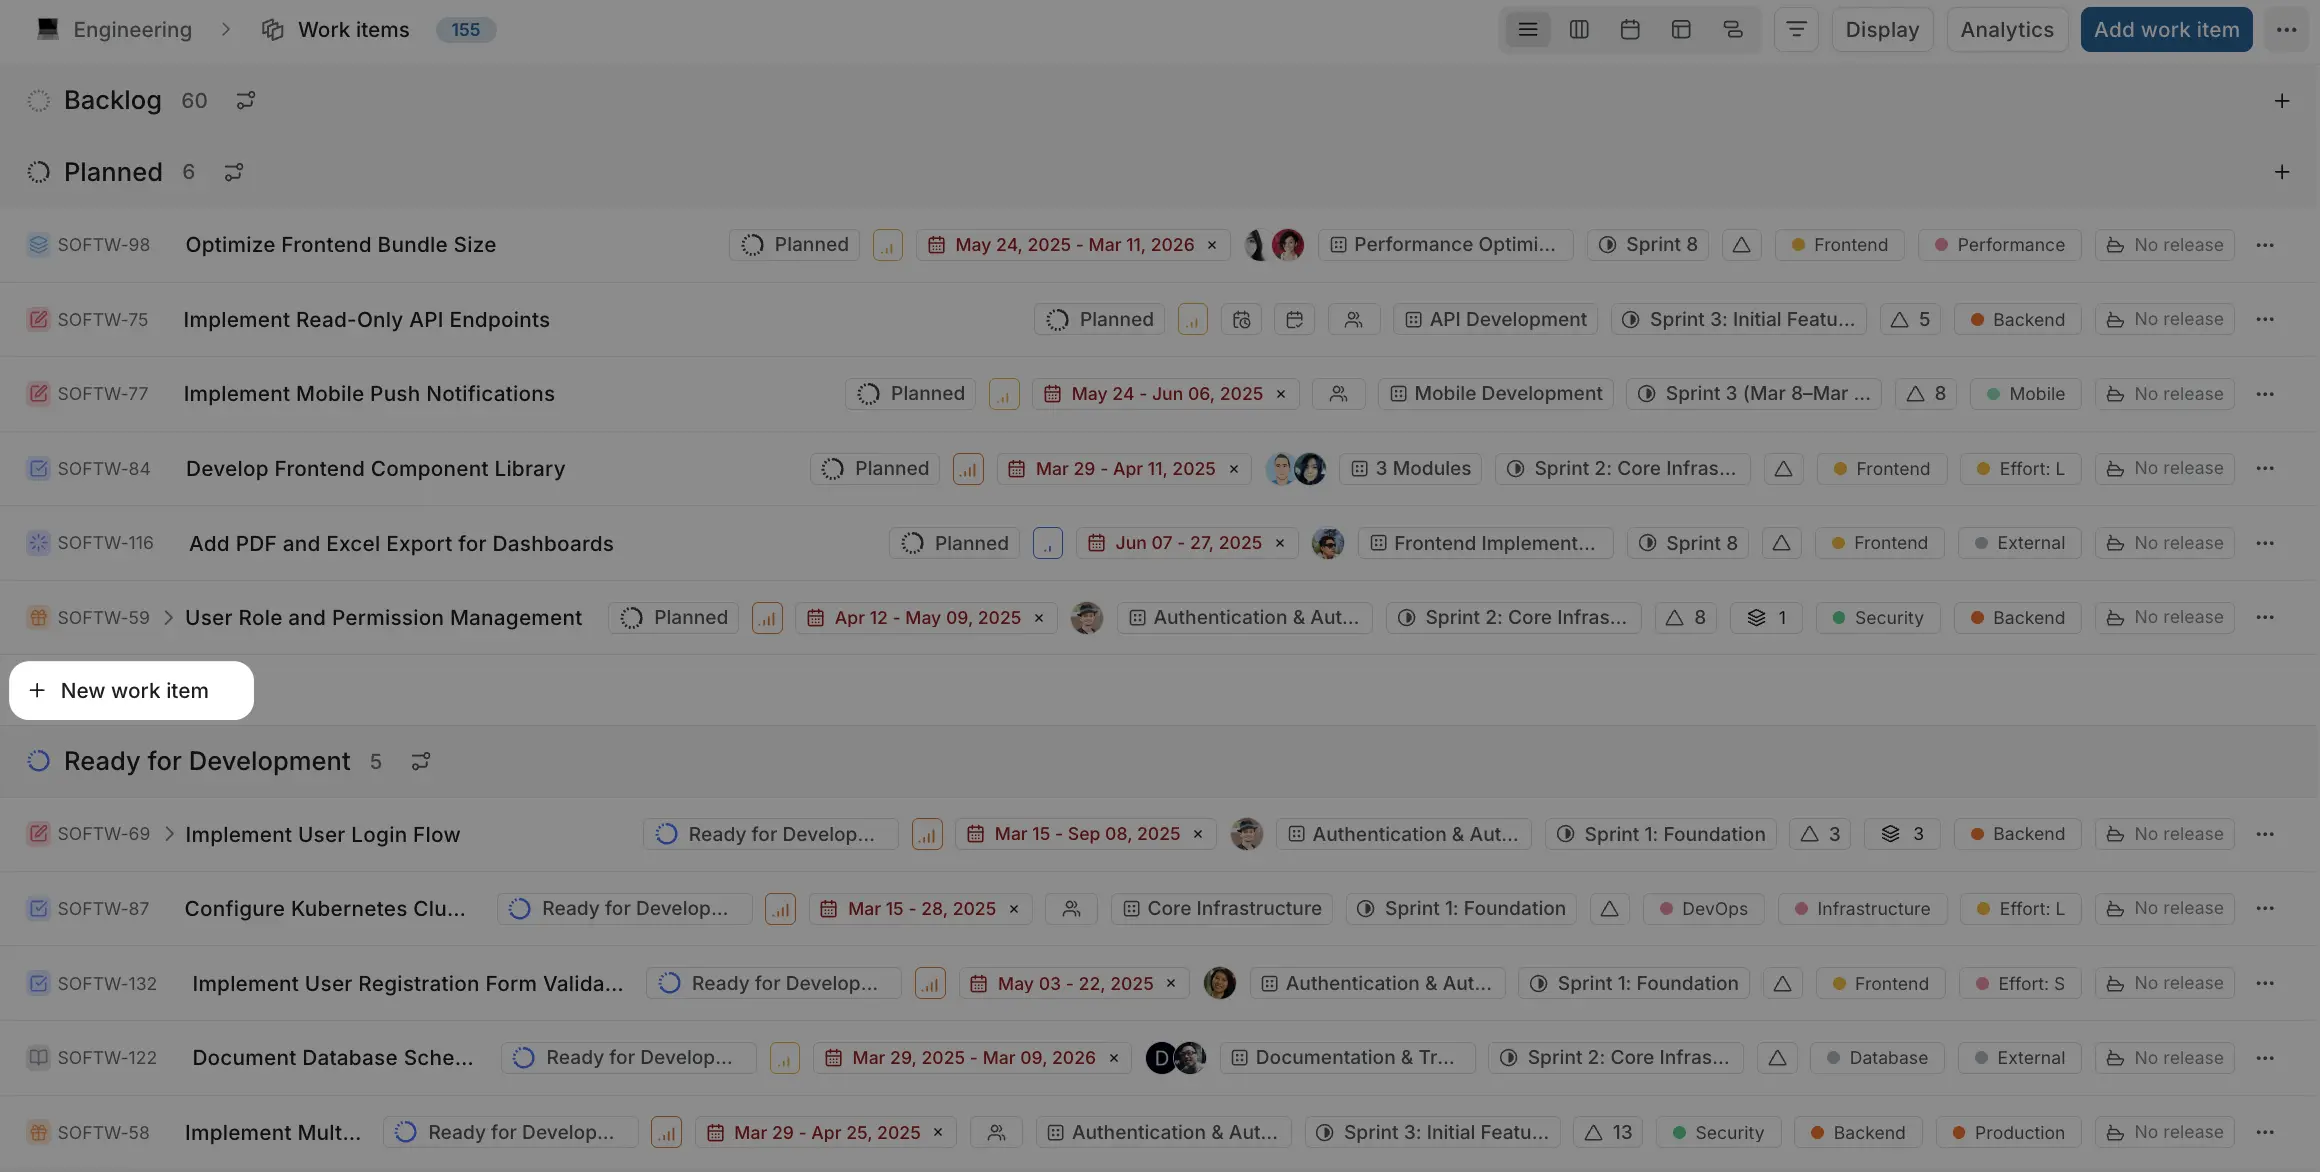
Quick add creates a work item from a title alone, without opening the modal. It's the fastest way to capture a list of tasks during a meeting.
- In a project's work items, click New work item at the bottom of the list, group, or column. In the Calendar layout, hover over a day to see it.
- Type a title and press
Enter.
The work item takes the value of the group you added it to. For example, a work item added to the In Progress column on a board gets the In Progress state, and one added under a label group gets that label. In the Calendar layout, it gets the day you picked as its due date. Everything else uses the project's defaults, and you can fill it in later.
Other ways to create work items
| Method | Use it when |
|---|---|
| Create via URL | You want a link, bookmark, or script that opens the create modal with fields already filled in. |
| Work item templates | Your team files the same kind of work item often, such as bug reports or onboarding checklists. |
| Recurring work items | The same work repeats on a schedule, such as a weekly report. |
| Intake | People outside the project, or outside Plane, need to submit requests for your team to review. |
| Sub-work items | You're breaking a larger work item into smaller pieces. |
| Importers | Your work items are in Jira, Linear, Asana, ClickUp, or a CSV file. |
| Plane AI | You want to describe the work in plain language and let Plane AI draft the work items. |
Edit a work item
You can change a work item in three places:
- In a layout. Click a property on the work item's row, card, or cell and pick a new value. The List, Board, and Table layouts show the properties you choose in display options.
- In the work item. Click the work item to open it and change anything in the title, description, or properties. See Work item details.
- Several at once. Select work items in the List or Table layout and change a property for all of them. See Bulk operations.
Plane saves each change as you make it and records it in the work item's activity.
Make a copy of a work item Pro
Use Make a copy to create a new work item from an existing one, in the same project or in a different project in the workspace. It's useful for reusing a well-written work item or handing work to another team.
- Open the work item, click the ••• menu at the top right, and choose Make a copy. You can also right-click the work item in a layout.
- Choose the destination project. The current project is selected.
- Click Done.
The copy gets a new ID from the destination project. Plane links the copy to the original with a Duplicate of relation, so you can always trace where it came from.
To copy many work items at once, see Copy work items.
What gets copied
Some properties, like cycles, modules, and estimates, belong to a single project, so they can't follow a work item into another project.
| Property | Copy in the same project | Copy to a different project |
|---|---|---|
| Title | Adds (Copy) to the end | Unchanged |
| Work item type | Kept | The destination project's default type. See the note below. |
| State | Kept | A starting state in the destination project |
| Priority | Kept | Kept |
| Start and due dates | Kept | Kept |
| Description | Copied | Copied |
| Links and attachments | Copied | Copied |
| Relations | Copied | Copied |
| Releases | Kept | Kept |
| Assignees | Kept | Cleared |
| Labels | Kept | Cleared, unless your workspace uses Workspace Governance |
| Cycle | Kept | Cleared |
| Modules | Kept | Cleared |
| Estimate | Kept | Cleared |
| Custom properties | Kept | Added to the end of the description as text |
| Parent | Cleared | Cleared |
| Sub-work items | Not copied | Not copied |
| Customer requests | Not copied | Not copied |
Custom property values can't carry across projects as structured fields, so Plane writes them into the copy's description instead. Nothing is lost, but you need to re-enter them in the destination project's properties if you want to filter or group by them.
Work item types across projects
If your workspace uses Workspace Governance, the copy keeps its type as long as that type is active in the destination project. Otherwise it gets the destination project's default type. This applies to epics too. If the destination project doesn't have the Epic type, the copied epic becomes a regular work item.
A few more things to know:
- Copying an archived work item creates an active work item, not an archived one.
- You need permission to create work items in the destination project.
Archive a work item
Archiving takes a finished work item out of your active lists without deleting it. Archived work items keep all their data and stay searchable, and you can restore them at any time.
You can only archive work items in a Completed or Cancelled state. For other work items, the Archive option is turned off.
- Open the work item, or right-click it in a layout.
- Click the ••• menu and choose Archive.
- Click Archive to confirm.
To archive several work items at once, select them in the List or Table layout and use bulk operations. To archive work items automatically after they've been closed for a while, turn on Auto-archive closed work items in the project's automation settings.
Find archived work items
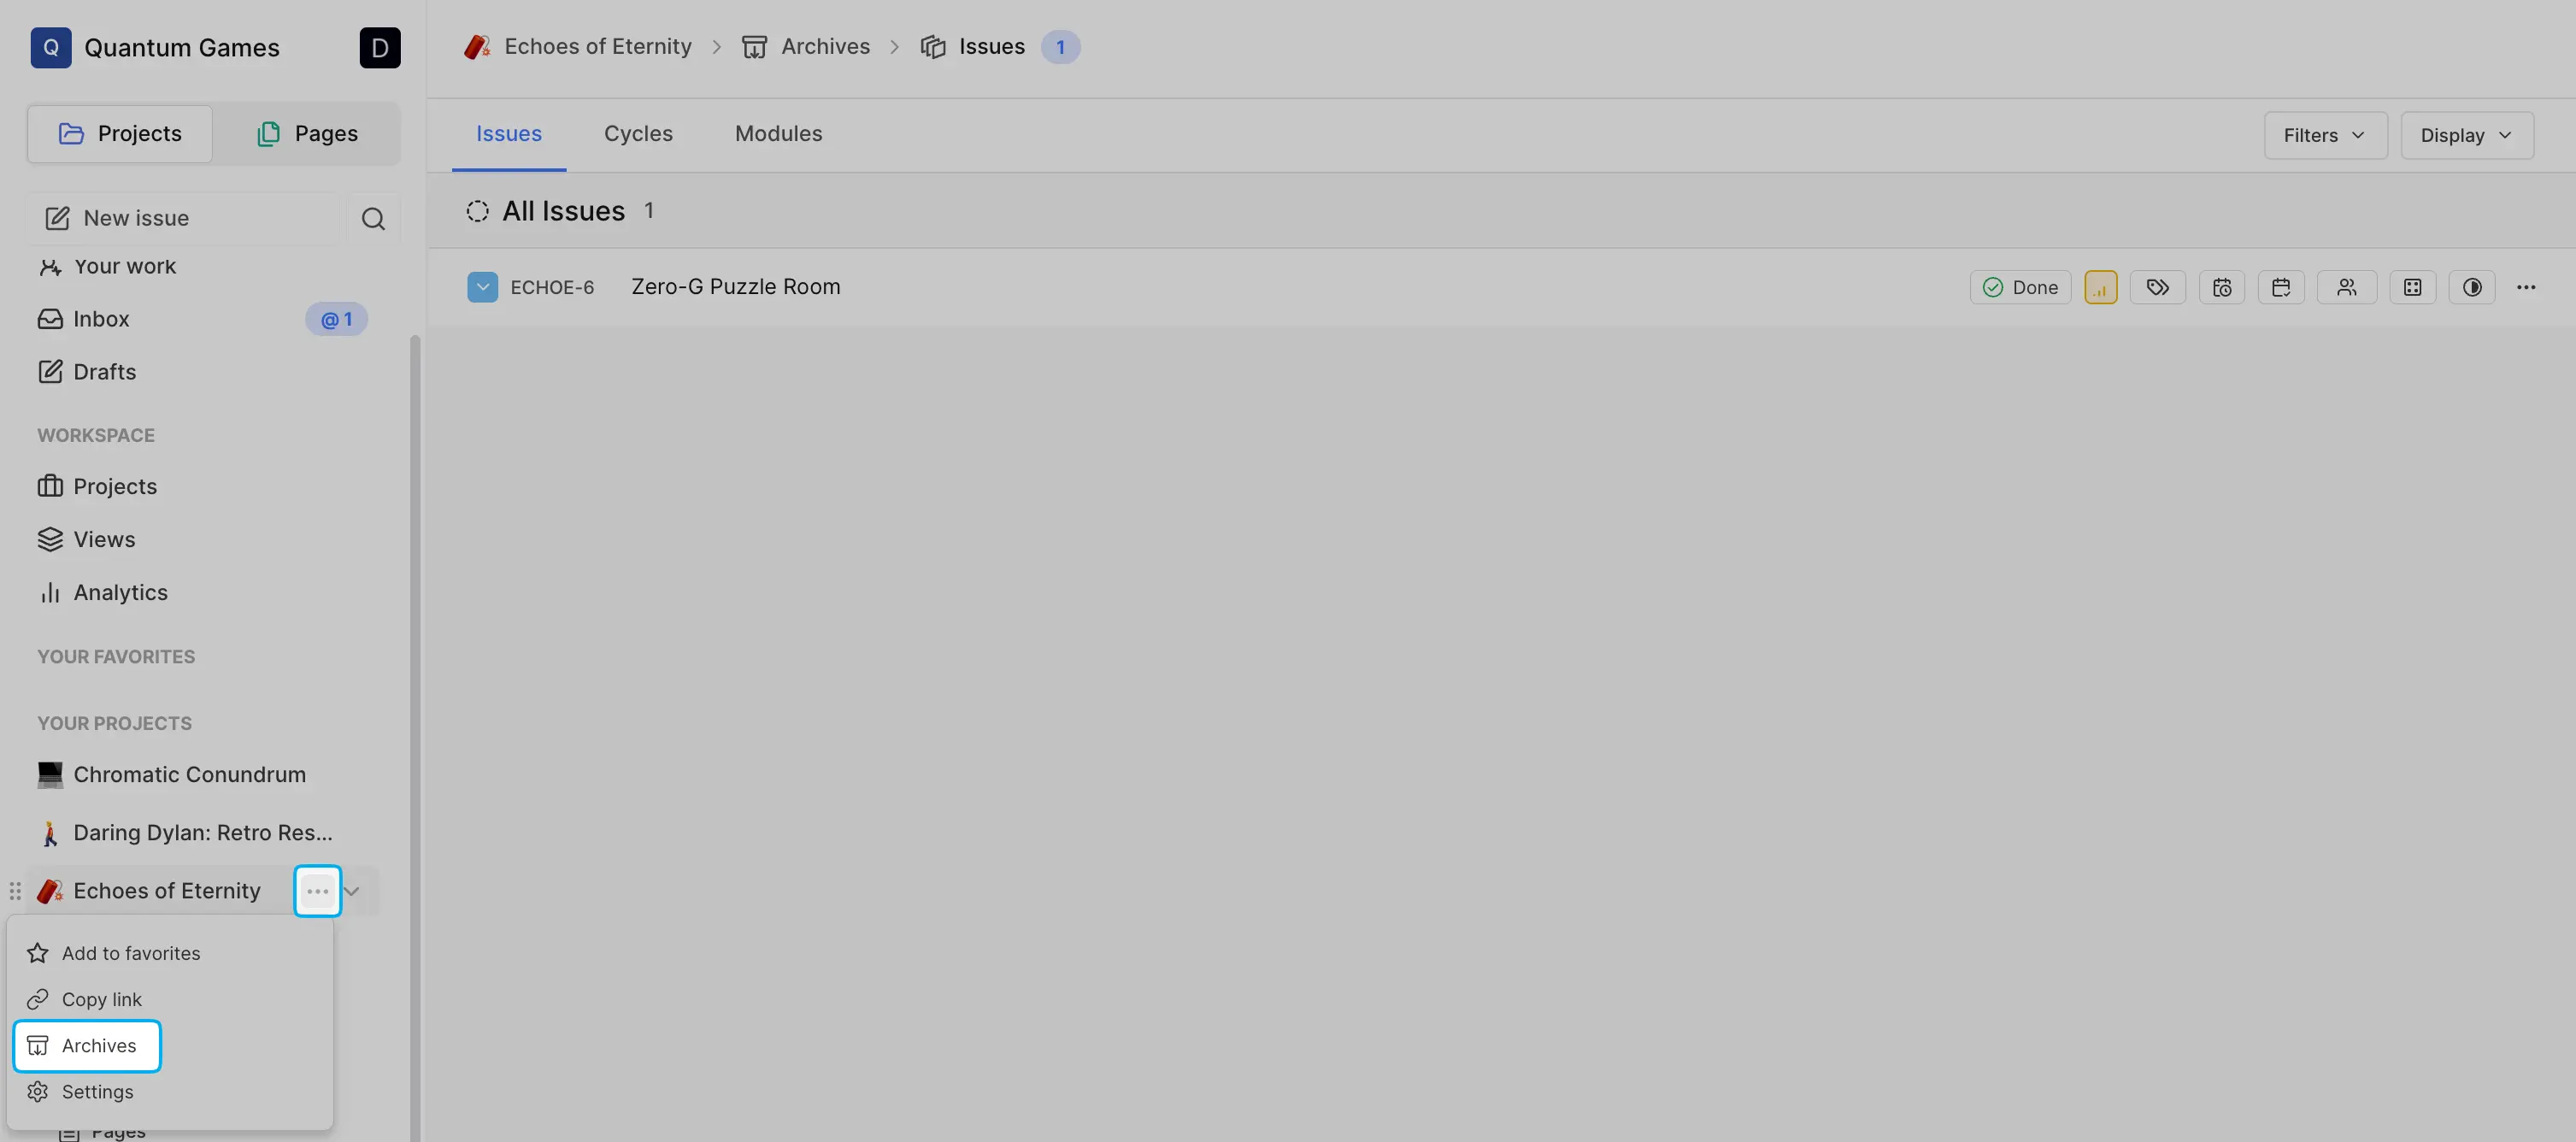
Click the ••• menu next to the project name in the sidebar and choose Archives, or press G then R inside the project.
An archived work item is read-only. You can open it and read its description, properties, comments, and activity, but you can't edit it, comment on it, vote on it, or subscribe to it until you restore it.
Restore an archived work item
- Open the archived work item from the project's Archives.
- Click the ••• menu and choose Restore.
The work item goes back to the project's active work items with all its properties and history.
Delete a work item
Deleting a work item removes it permanently. You can't undo it.
WARNING
Deleting a work item also deletes all of its sub-work items and attachments. If you want to keep a sub-work item, remove it from the parent before you delete the parent.
- Open the work item, or right-click it in a layout.
- Click the ••• menu and choose Delete.
- Click Delete to confirm.
Admins can delete any work item in the project. Contributors can delete only the work items they created. If you're not sure you'll need a finished work item again, archive it instead.