

Work item details
Everything about a single work item lives in its detail view: the description, properties, sub-work items, relations, files, comments, and a full history of changes. This page walks through each part of the detail view and what you can do there.
Open a work item
Click a work item in any layout. It opens in side peek by default, a panel next to your list, so you can move between work items without losing your place.
To change how the work item opens, use the peek mode switcher at the top of the panel:
- Side peek opens a panel next to the list.
- Modal opens the work item as a window in the center of the screen.
- Full screen fills the whole content area.
Side peek comes back as the default each time you open a new work item. To open the work item on its own page, click Open work item in full screen at the top of the peek view, or choose Open in new tab from the ••• menu.
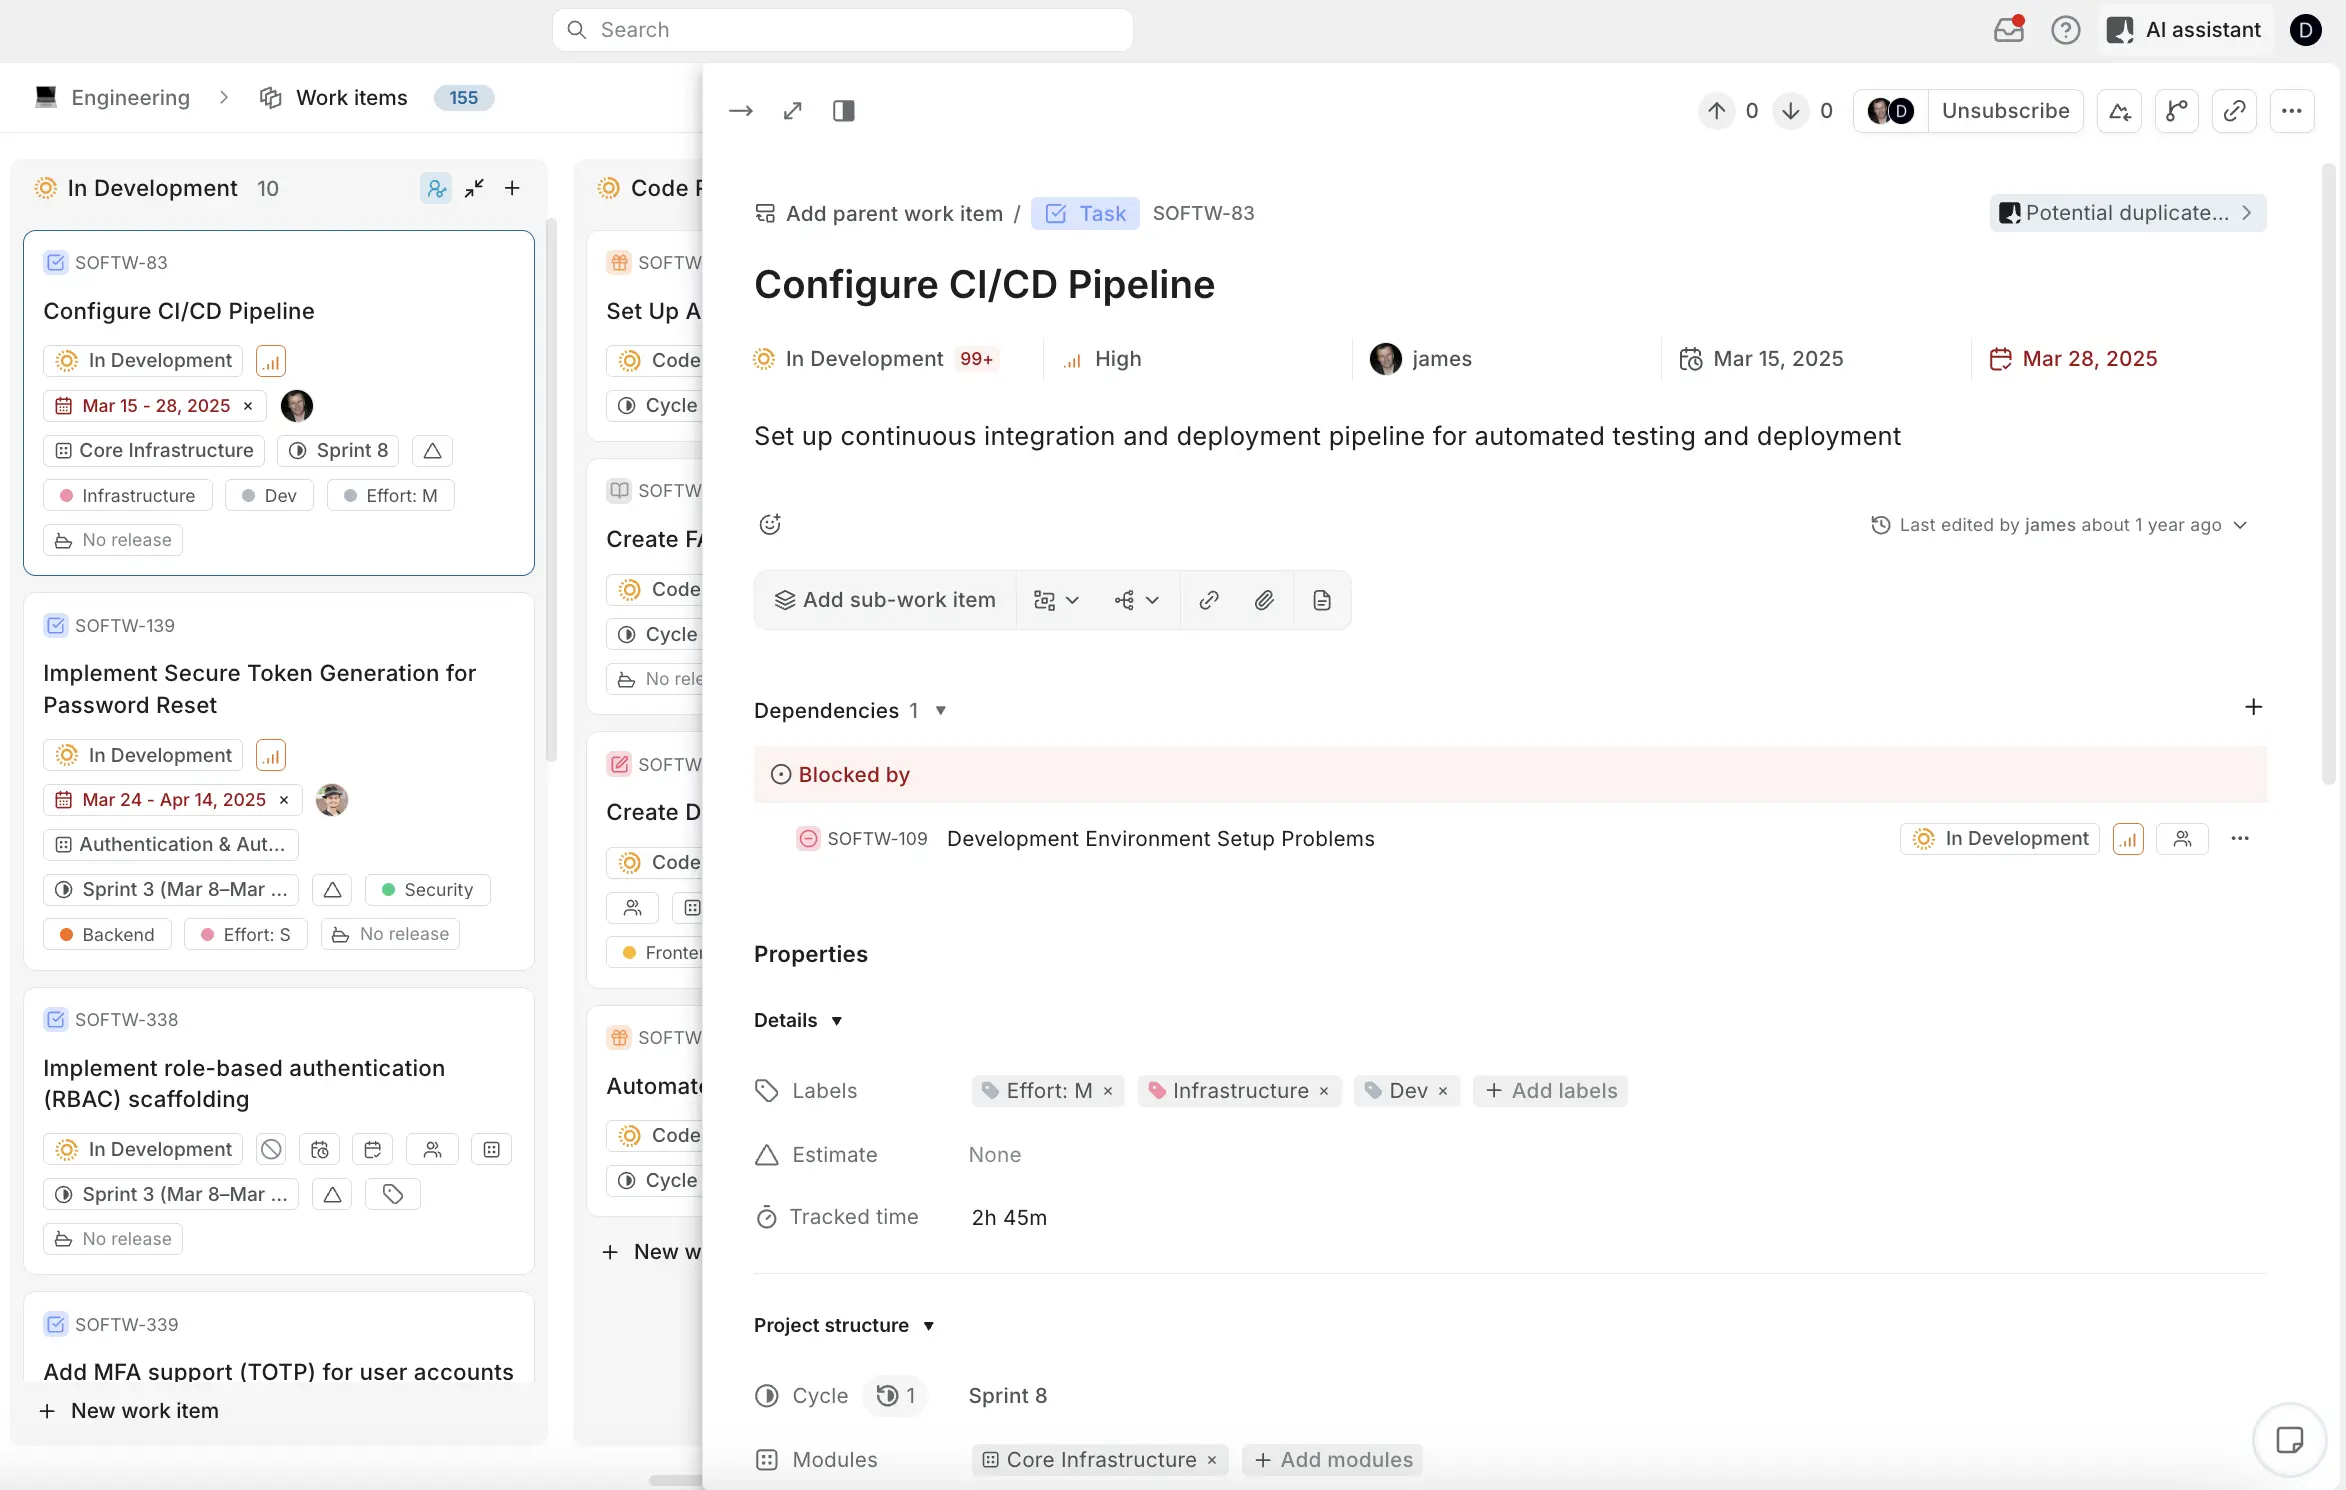
Parts of the detail view
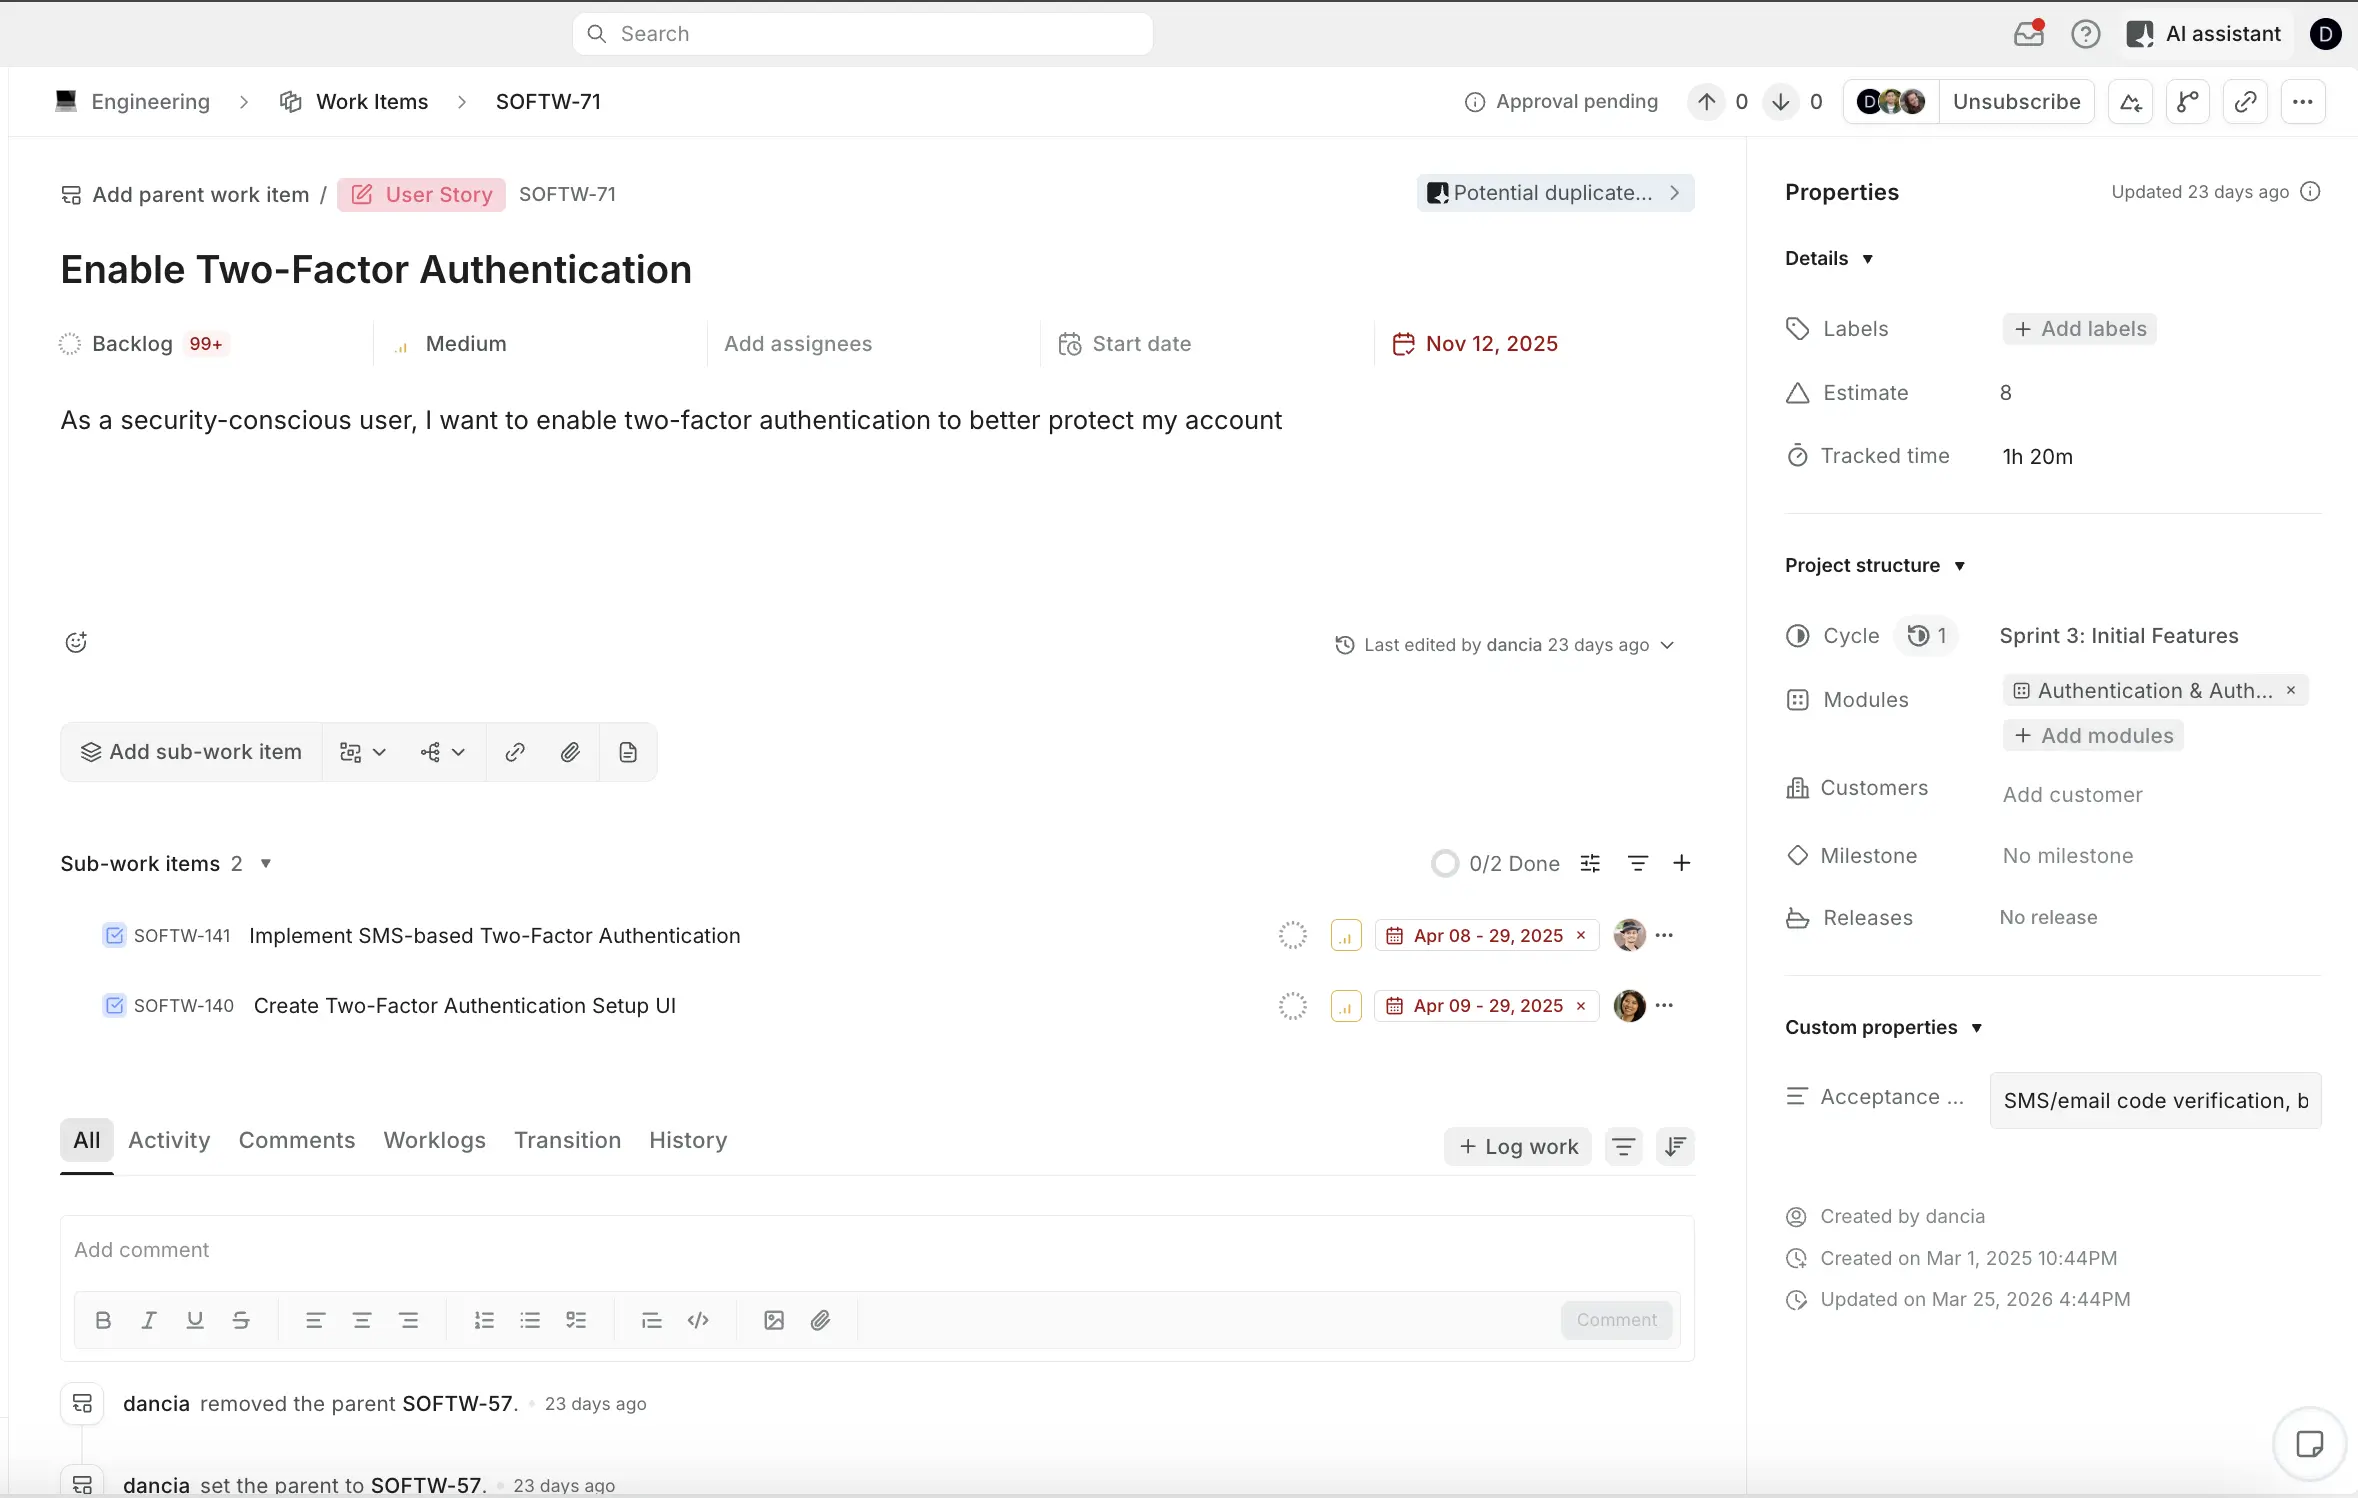
Header
The header shows where the work item lives, with a breadcrumb of the project and the work item ID. It also holds the actions for the whole work item:
- Approve and Reject appear when the work item is waiting for your approval in a workflow.
- Votes show how many people upvoted or downvoted the work item. See Vote on a work item.
- Subscribe turns notifications for this work item on or off. See Subscribers.
- Copy link copies the work item's URL.
- Copy as prompt copies the work item for an AI coding tool. See Send a work item to a coding agent.
- The ••• menu has Make a copy, Open in new tab, Archive, Delete, and, when the work item is in a cycle or module, options to remove it from them. See Create and manage work items.
Title, ID, and type
Click the title to edit it. The title can be up to 255 characters.
The work item's ID appears above the title. Click the ID to copy it. If the project uses work item types, hover over the ID and click Switch work item type to change the type. When you switch types, custom property values that the new type doesn't have move into the description as text. You can't undo this.
If the work item has a parent, the parent appears above the title. Click the ••• next to the parent to see its other sub-work items or to remove the parent.
Meta row
The row under the title holds the properties you change most often: state, priority, assignees, start date, and due date. Click any of them to change it.
- If time in state is on for your workspace, a badge next to the state shows how long the work item has been in its current state. The badge doesn't appear for Completed or Cancelled states.
- If the work item belongs to a milestone and its due date is after the milestone's target date, a warning icon appears next to the due date.
Sidebar
The sidebar on the right groups the rest of the work item's properties into sections you can collapse:
- Details has the parent, labels, estimate, and tracked time.
- Project structure has the cycle, modules, customers, milestone, and releases. Each one only appears when that feature is on for the project.
- Custom properties appear below, in the order the work item type defines.
The bottom of the sidebar shows who created the work item, when, when it was last updated, and when it was completed.
For what each property means and who can set it, see Work item properties.
Widget toolbar
The toolbar under the description adds things to the work item. Each button opens a section below the toolbar:
- Add sub-work item
- Add dependency
- Add relation
- Add link
- Attach
- Link pages
- Customer requests, when Customers is on
- Copy branch name
The rest of this page covers each of these.
Write the description
Click the description to start typing. The editor supports headings, lists, checklists, tables, code blocks, images, and @ mentions of people and work items. Type / to see every block you can add. See Editor blocks for the full list.
Plane saves the description as you type. When you @ mention a project member in the description, Plane notifies them and subscribes them to the work item.
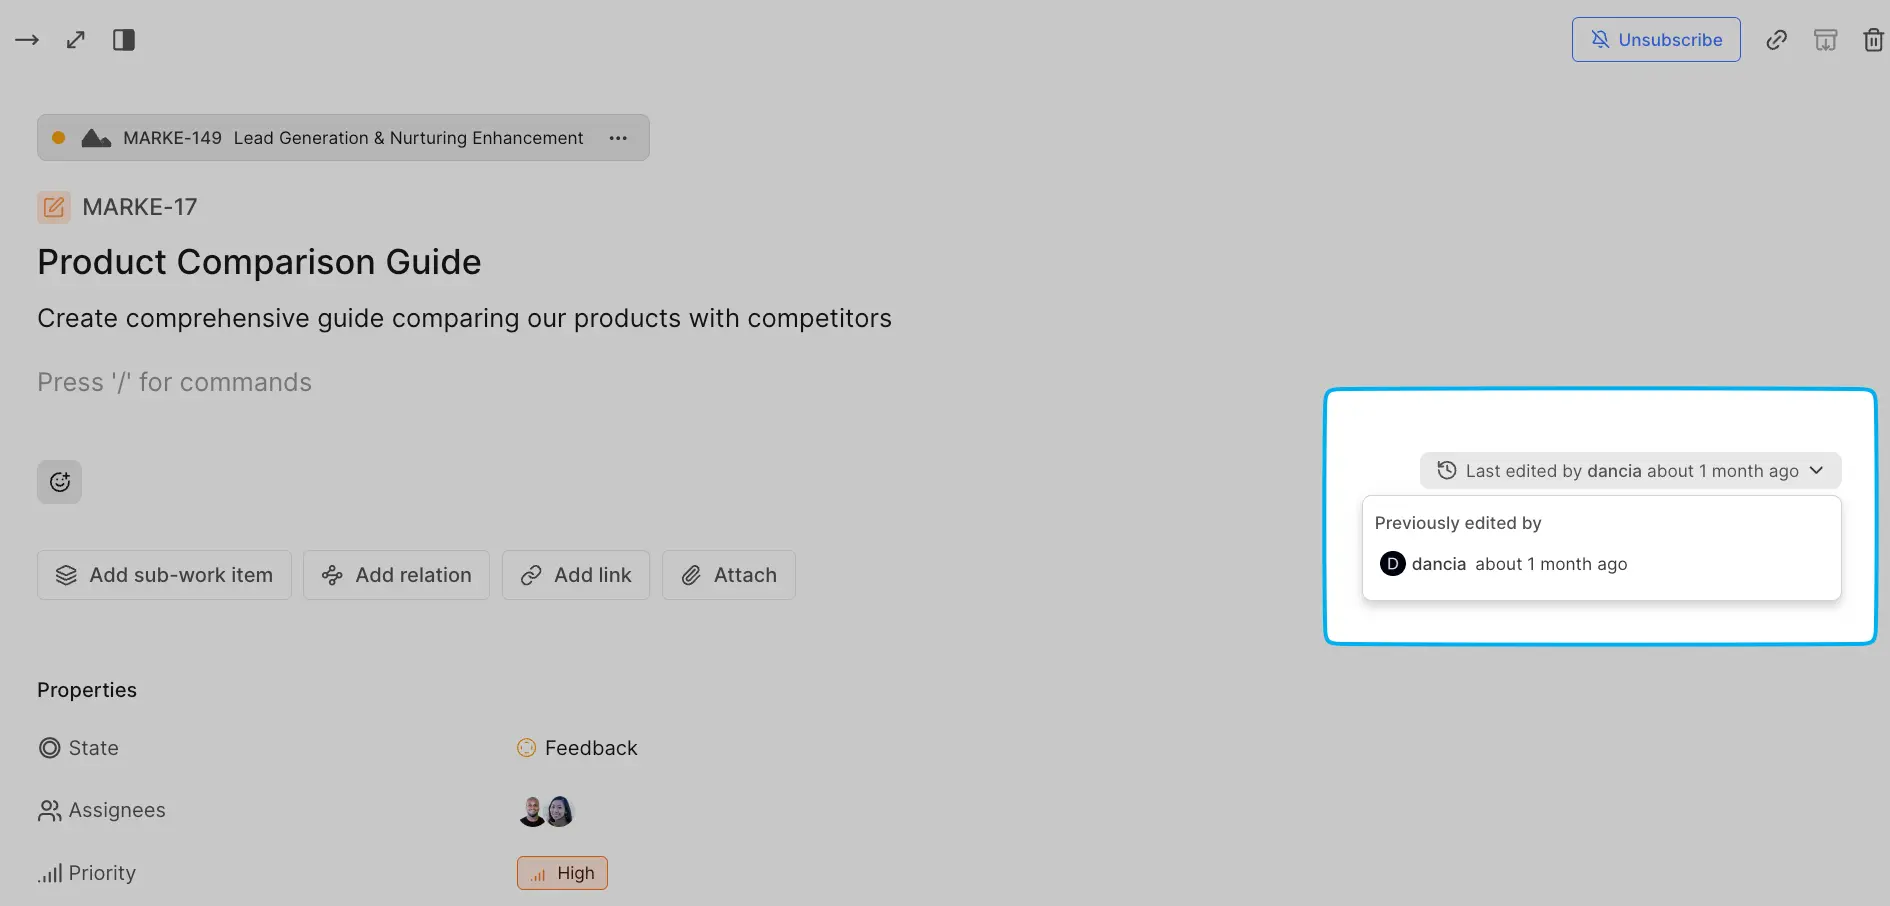
See and restore earlier versions
Plane keeps a version of the description each time someone edits it.
- Click Last edited by at the bottom of the description.
- Pick a version from the list to open it.
- In the version window, click Copy markdown to copy that version's text, or Restore to replace the current description with it.
You need edit access to the work item to restore a version.
React and vote
React with an emoji
Below the description, click the emoji icon and choose a reaction. Click a reaction someone else added to add yours to it, or click your own to remove it.
Vote on a work item
Use votes to show how much the team wants something done, which is useful for feature requests and bug triage.
- Click Upvote or Downvote in the header. Click it again to take your vote back.
- Click the vote count to see who voted.
You can't vote on archived work items. To filter work items by votes, use PQL.
Add sub-work items
Sub-work items break a large piece of work into smaller ones that can have their own assignees, states, and dates.
- Click Add sub-work item in the toolbar.
- Choose Create new to open the create modal with this work item already set as the parent, or Add existing to search for work items and pick one or more.
A sub-work item can be in a different project from its parent. The search in Add existing covers every project in the workspace.
If your workspace has hierarchy levels, Plane only lets you add sub-work items of the types allowed under the parent's type.
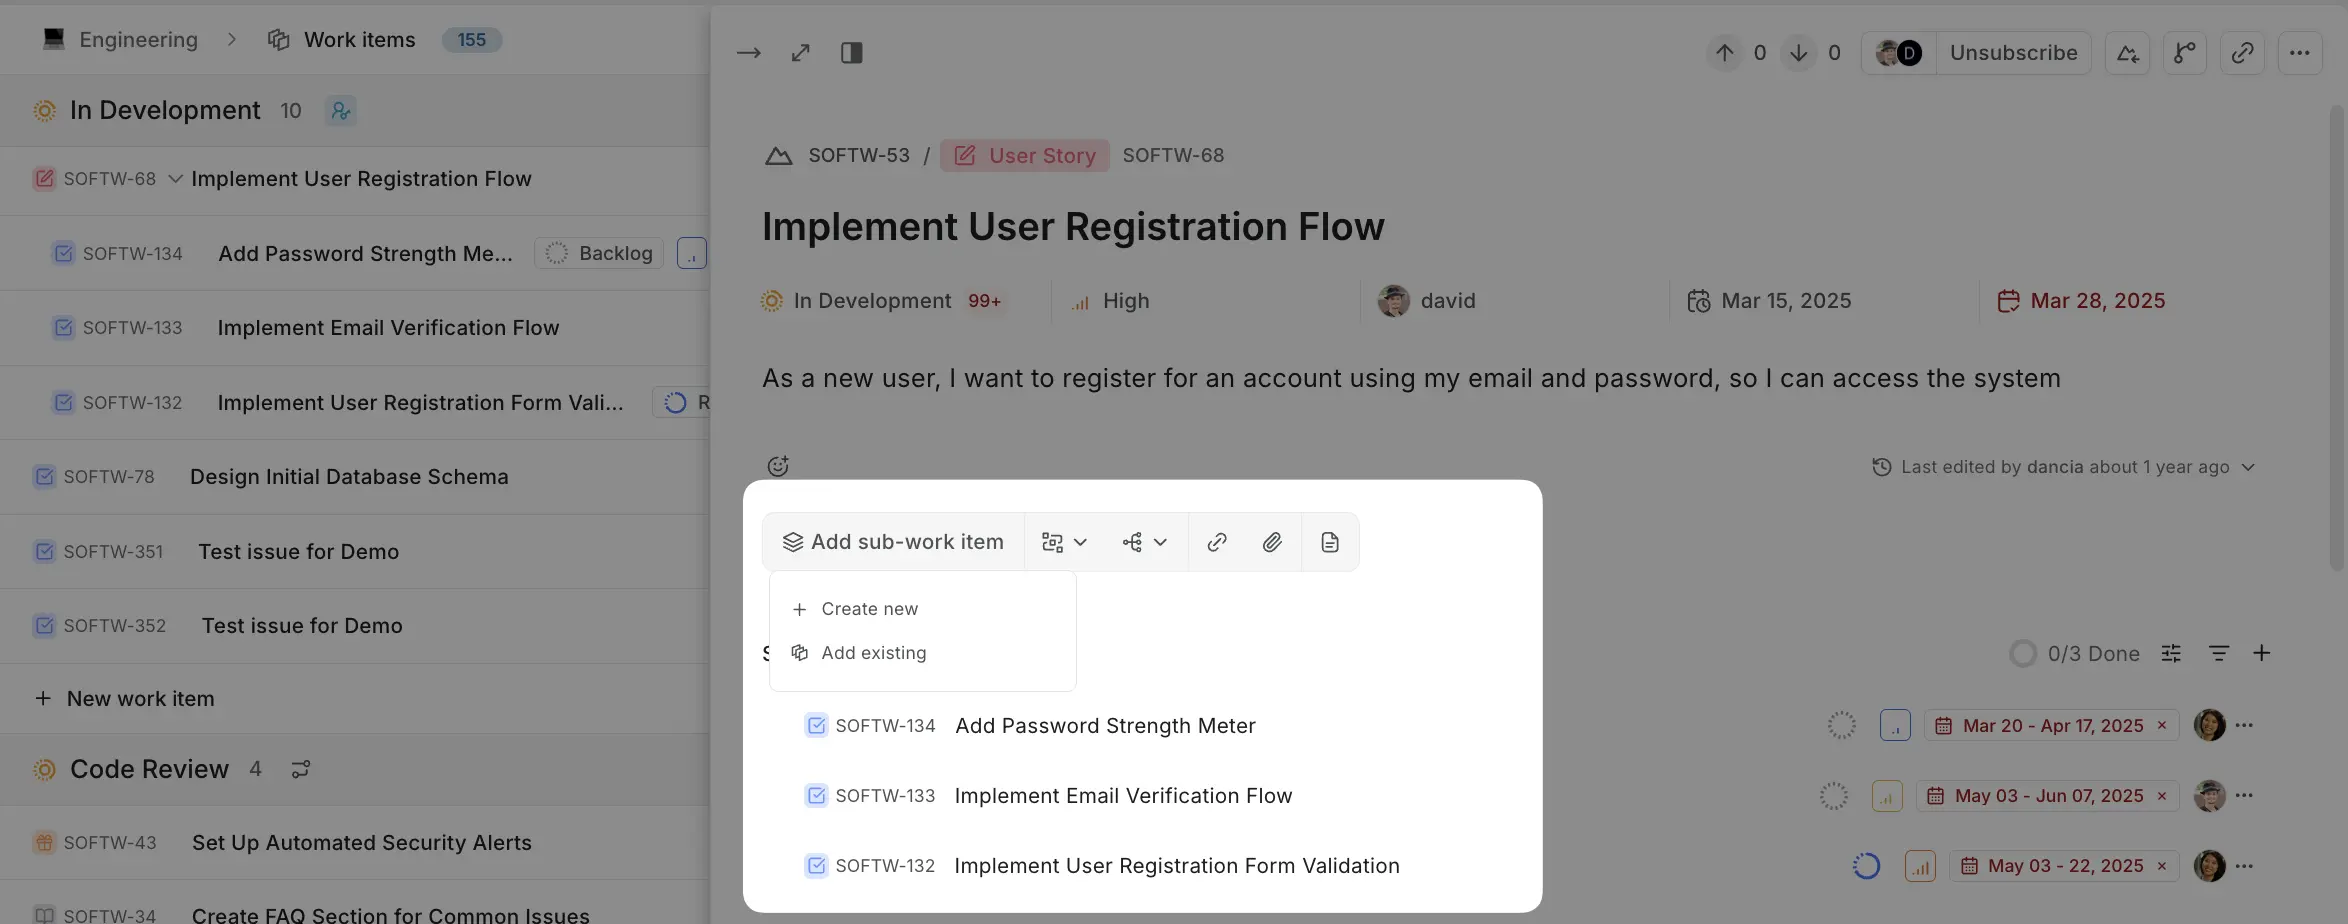
Work with the sub-work items list
The Sub-work items section shows a progress bar for the sub-work items. From the section header you can:
- Filter the list by priority, state group, assignee, work item type, or project.
- Change how the list is grouped and ordered, and which properties show on each row.
You can also change a sub-work item's properties right from its row.
Remove a sub-work item from its parent
Open the sub-work item, click the ••• next to the parent above the title, and choose Remove parent work item. The sub-work item stays in its project as a standalone work item.
WARNING
Deleting a parent work item also deletes all of its sub-work items. Remove the parent first from any sub-work item you want to keep.
Set or change the parent
To give a work item a parent, click Parent in the sidebar's Details section and search for the parent. You can pick a work item from any project in the workspace.
Add relations
Relations show how two work items are connected without affecting their dates.
- Click Add relation in the toolbar.
- Choose the relation type.
- Search for the other work item and select it.
| Relation | Use it when |
|---|---|
| Relates to | The two work items are about the same thing, but neither depends on the other. |
| Duplicate of | This work item describes the same thing as another one. You'll usually close the duplicate and keep the other. |
| Implements | This work item delivers what the other one describes, such as a task that implements a requirement. |
| Implemented by | The other work item delivers what this one describes. It's the reverse of Implements. |
Plane adds the matching relation to the other work item for you. If you mark A as Implements B, then B shows Implemented by A.
Implements and Implemented by are available when timeline dependencies are on.
To add your own relation types, such as Tested by or Caused by, see Custom relations.
Add dependencies
Dependencies set the order work has to happen in. Plane draws them as connectors in the Timeline layout.
- Click Add dependency in the toolbar.
- Choose the dependency type.
- Search for the other work item and select it.
| Dependency | Meaning |
|---|---|
| Blocked by | This work item can't be finished until the other one is. |
| Blocking | The other work item can't be finished until this one is. |
| Starts before | This work item has to start before the other one starts. |
| Starts after | This work item can only start after the other one starts. |
| Finishes before | This work item has to finish before the other one finishes. |
| Finishes after | This work item can only finish after the other one finishes. |
Blocked by and Blocking are always available. The start and finish dependencies are available when timeline dependencies are on.
When both work items have start and due dates, the Timeline layout draws the dependency as a line. A red line means the dates break the dependency, such as a work item that starts before the one it's waiting on finishes.
Add links and attachments
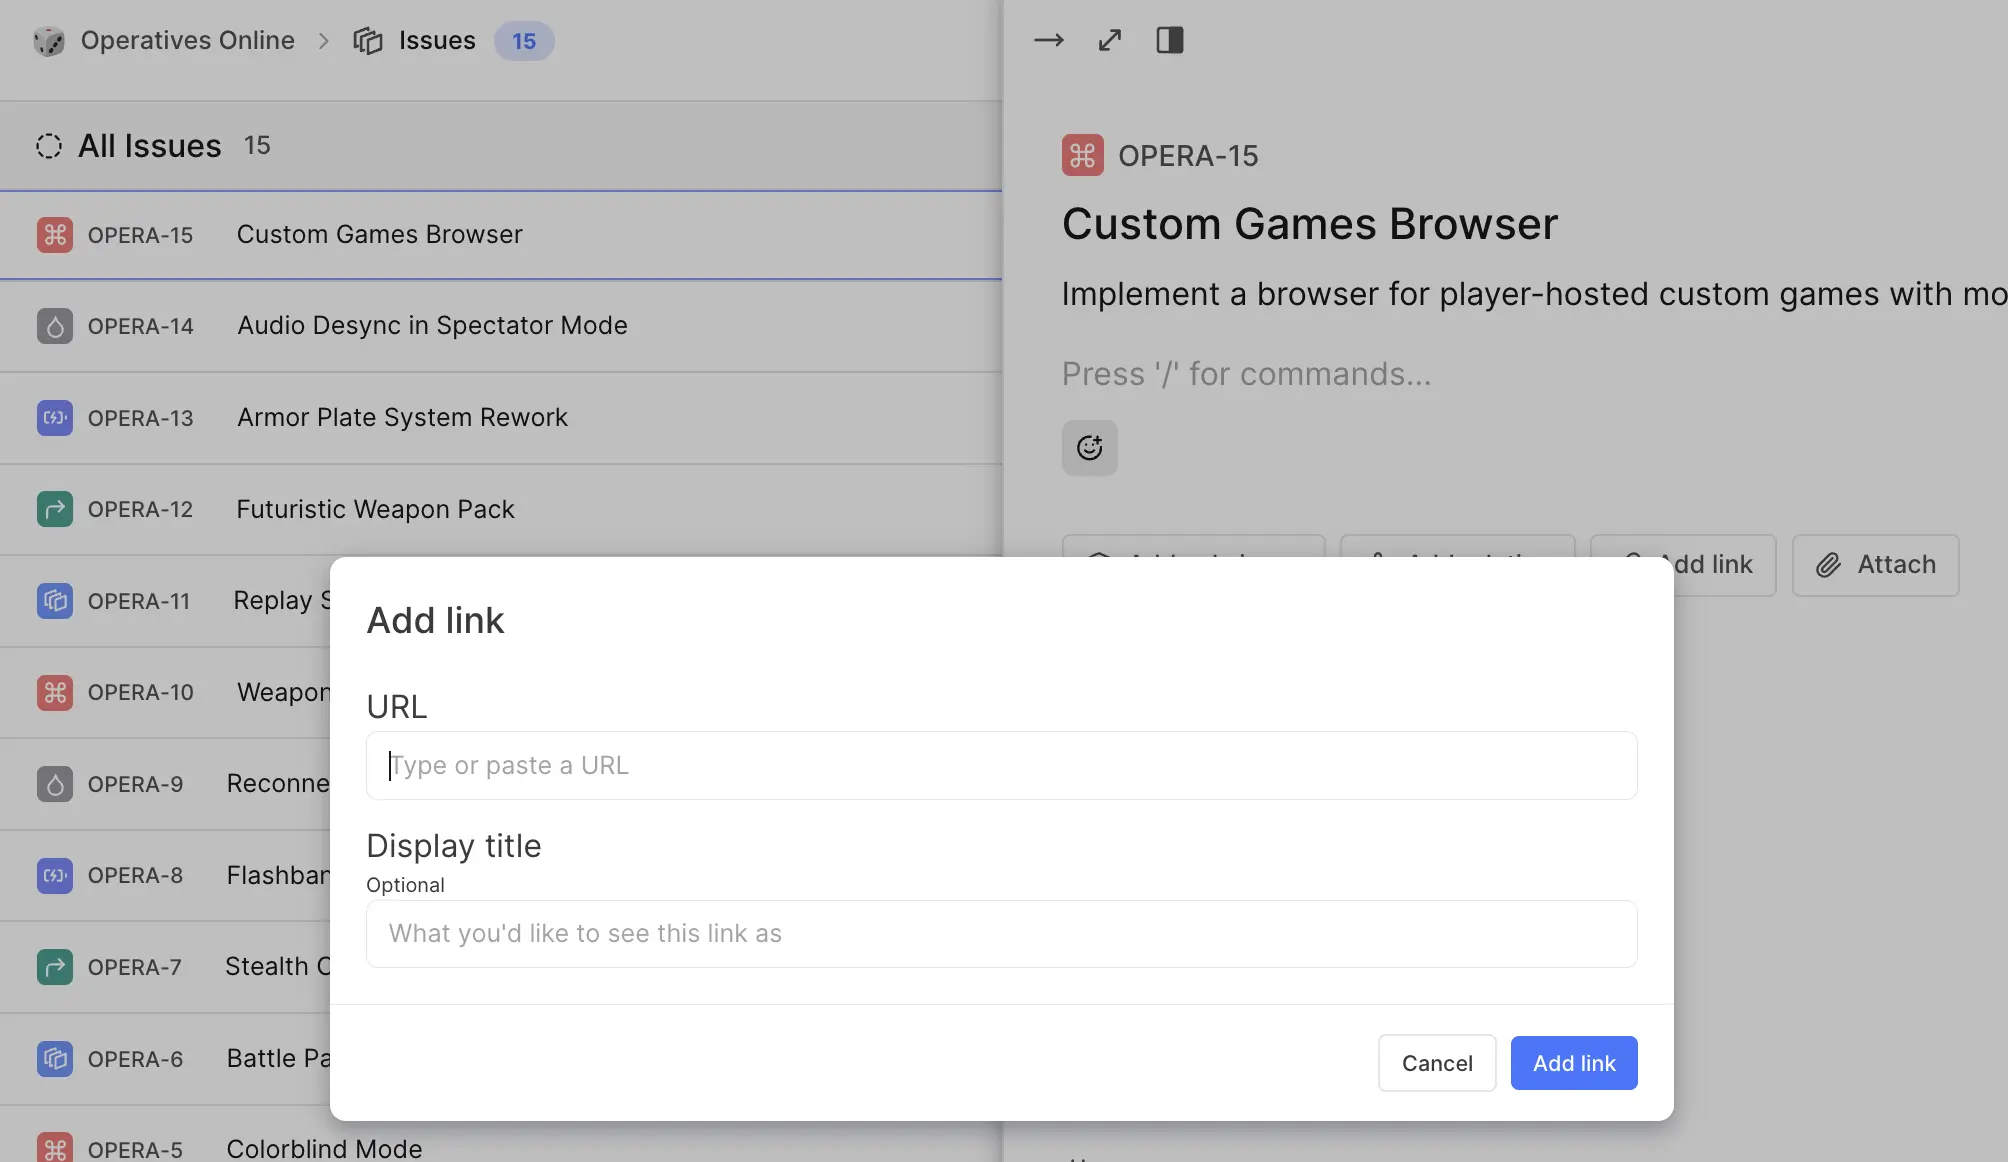
Add a link
- Click Add link in the toolbar.
- Paste the URL. Optionally, add a display title.
- Save the link.
Links appear in the Links section of the work item.
Attach a file
Click Attach in the toolbar and choose one or more files. You can also paste or drag images straight into the description.
Each file can be up to 5 MB. On Plane Cloud, paid plans can attach files up to 100 MB. On self-hosted Plane, your instance admin sets the limit with the FILE_SIZE_LIMIT environment variable.
Plane accepts these file types:
| Category | Formats |
|---|---|
| Images | JPEG, PNG, GIF, SVG, WebP, TIFF, BMP |
| Documents | PDF, Word, Excel, PowerPoint, plain text, RTF, Markdown, OpenDocument text, spreadsheet, presentation, and graphics |
| Audio | MP3, WAV, OGG, MIDI, AAC, FLAC, M4A |
| Video | MP4, MPEG, OGG video, WebM, QuickTime, AVI, WMV |
| Archives | ZIP, RAR, TAR, GZIP |
| Diagrams | Microsoft Visio |
| 3D models | GLTF binary, GLTF JSON, OBJ |
| Fonts | TrueType, OpenType, WOFF, WOFF2 |
| Code and data | CSS, JavaScript, JSON, XML, CSV, SQL |
| Other | Netpbm images (PGM, PBM, PPM) and OpenOffice Base databases |
Self-hosted instance admins can allow every file type by setting ALLOW_ALL_ATTACHMENT_TYPES=1.
Link pages Pro
Link the project or wiki pages that hold the spec, design notes, or decisions for this work item, so anyone working on it can find them.
- Click Link pages in the toolbar.
- Search for pages in the project. Turn on Show Wiki pages to include pages from the workspace wiki.
- Select the pages you want and click Confirm.
Linked pages appear in the Pages section of the work item.
Post work item updates
Updates are short status reports on a work item, separate from comments. Each update has a status, so anyone reading the work item can see at a glance whether it's on track.
- In the activity area at the bottom of the work item, click the Updates tab.
- Click Add Update.
- Choose a status: On Track, At Risk, or Off Track.
- Write the update and click Add update.
Each update also shows the progress of the work item's sub-work items since the last update. Other members can react to an update and comment on it. If the work item is part of an initiative, its updates show up there too.
Copy the branch name
Click Copy branch name in the toolbar to copy a Git branch name for this work item. The name uses your display name and the work item ID, such as sarah/WEB-142. Spaces in your display name become hyphens.
Using the same branch name pattern across the team makes it easy to find the branch for a work item. To link a pull request or merge request back to the work item, put the work item ID in its title or description. This needs the GitHub or GitLab integration.
Send a work item to a coding agent
Plane can package a work item as a prompt for an AI coding tool, so the agent starts with the full context instead of a one-line summary. The prompt includes the work item's ID, title, description, project, labels, sub-work items, relations, and comments.
Click Copy as prompt in the header to copy the prompt to your clipboard, then paste it into any AI tool. To send it straight to a coding tool, open the menu next to Copy as prompt and choose one under Open in:
- Cursor and Codex open the desktop app with the prompt filled in. If the prompt is too long to pass in a link, Plane copies it to your clipboard instead and opens the app, so you can paste it.
- Claude Code copies a terminal command that starts Claude Code with the prompt. Paste it into your terminal and press
Enter.
Activity and history
The tabs at the bottom of the work item show everything that has happened to it.
| Tab | What it shows |
|---|---|
| All | Comments, activity, and worklogs together in one feed, in time order. |
| Activity | Every change to the work item, such as state, assignee, and date changes, including changes made by automations. |
| Comments | Only comments and their replies. |
| Updates | Status updates posted on the work item. See Post work item updates. |
| Worklogs | Time logged against the work item. Appears when time tracking is on for the project. |
| Transition | Every state change, with how long the work item stayed in each state. |
| History | A full before-and-after record of every property change. |
Click Filters to show only some kinds of activity, such as state changes, assignee changes, comments, worklogs, or custom property changes. Use the sort button to switch between newest first and oldest first.
Comments
Add a comment in the box at the top of the Comments tab. Comments support rich text, @ mentions, images, and file attachments, and you can reply to any comment to start a thread. See Work item comments for everything you can do with comments, and Comments moderation for hiding comments that shouldn't be in the thread.
Transition
The Transition tab lists every state the work item has been in, who moved it, and when. Between two transitions, a badge shows how long the work item stayed in the earlier state, such as 3d or 54m. Use it to spot where work gets stuck. For example, a work item that spent three days in In Review and ten minutes in QA was waiting on review, not testing.
History
The History tab records each property change with the old value, the new value, who made the change, and when. Use it to answer questions like when a due date moved or who changed the assignee. Changes made by automations show the automation as the actor, such as "Cycle Automation Bot set the cycle to Cycle 1".