

Project Work Item Types Pro
Every work item in Plane has a type. When you enable Work Item Types, Plane creates two types for your project automatically: Task (the default) and Epic. Work Item Types let you go further by creating named types like Bug, Story, or Feature Request with the exact custom properties each type needs.
A Bug might need Version, Environment, and Steps to reproduce. A Content Request might need Channel, Reviewer, and Go-live date. A Feature Request might need Business value and Customer impact. Once you define a type, those properties appear automatically on every work item of that type.
INFO
On the Enterprise Grid, types are managed at the workspace level rather than at the project level. See Workspace Work Item Types for that configuration.
Create work item types
WARNING
Work Item Types cannot be disabled once turned on for a project. The feature itself is irreversible, though individual types can be disabled at any time.
Role: Project Admins
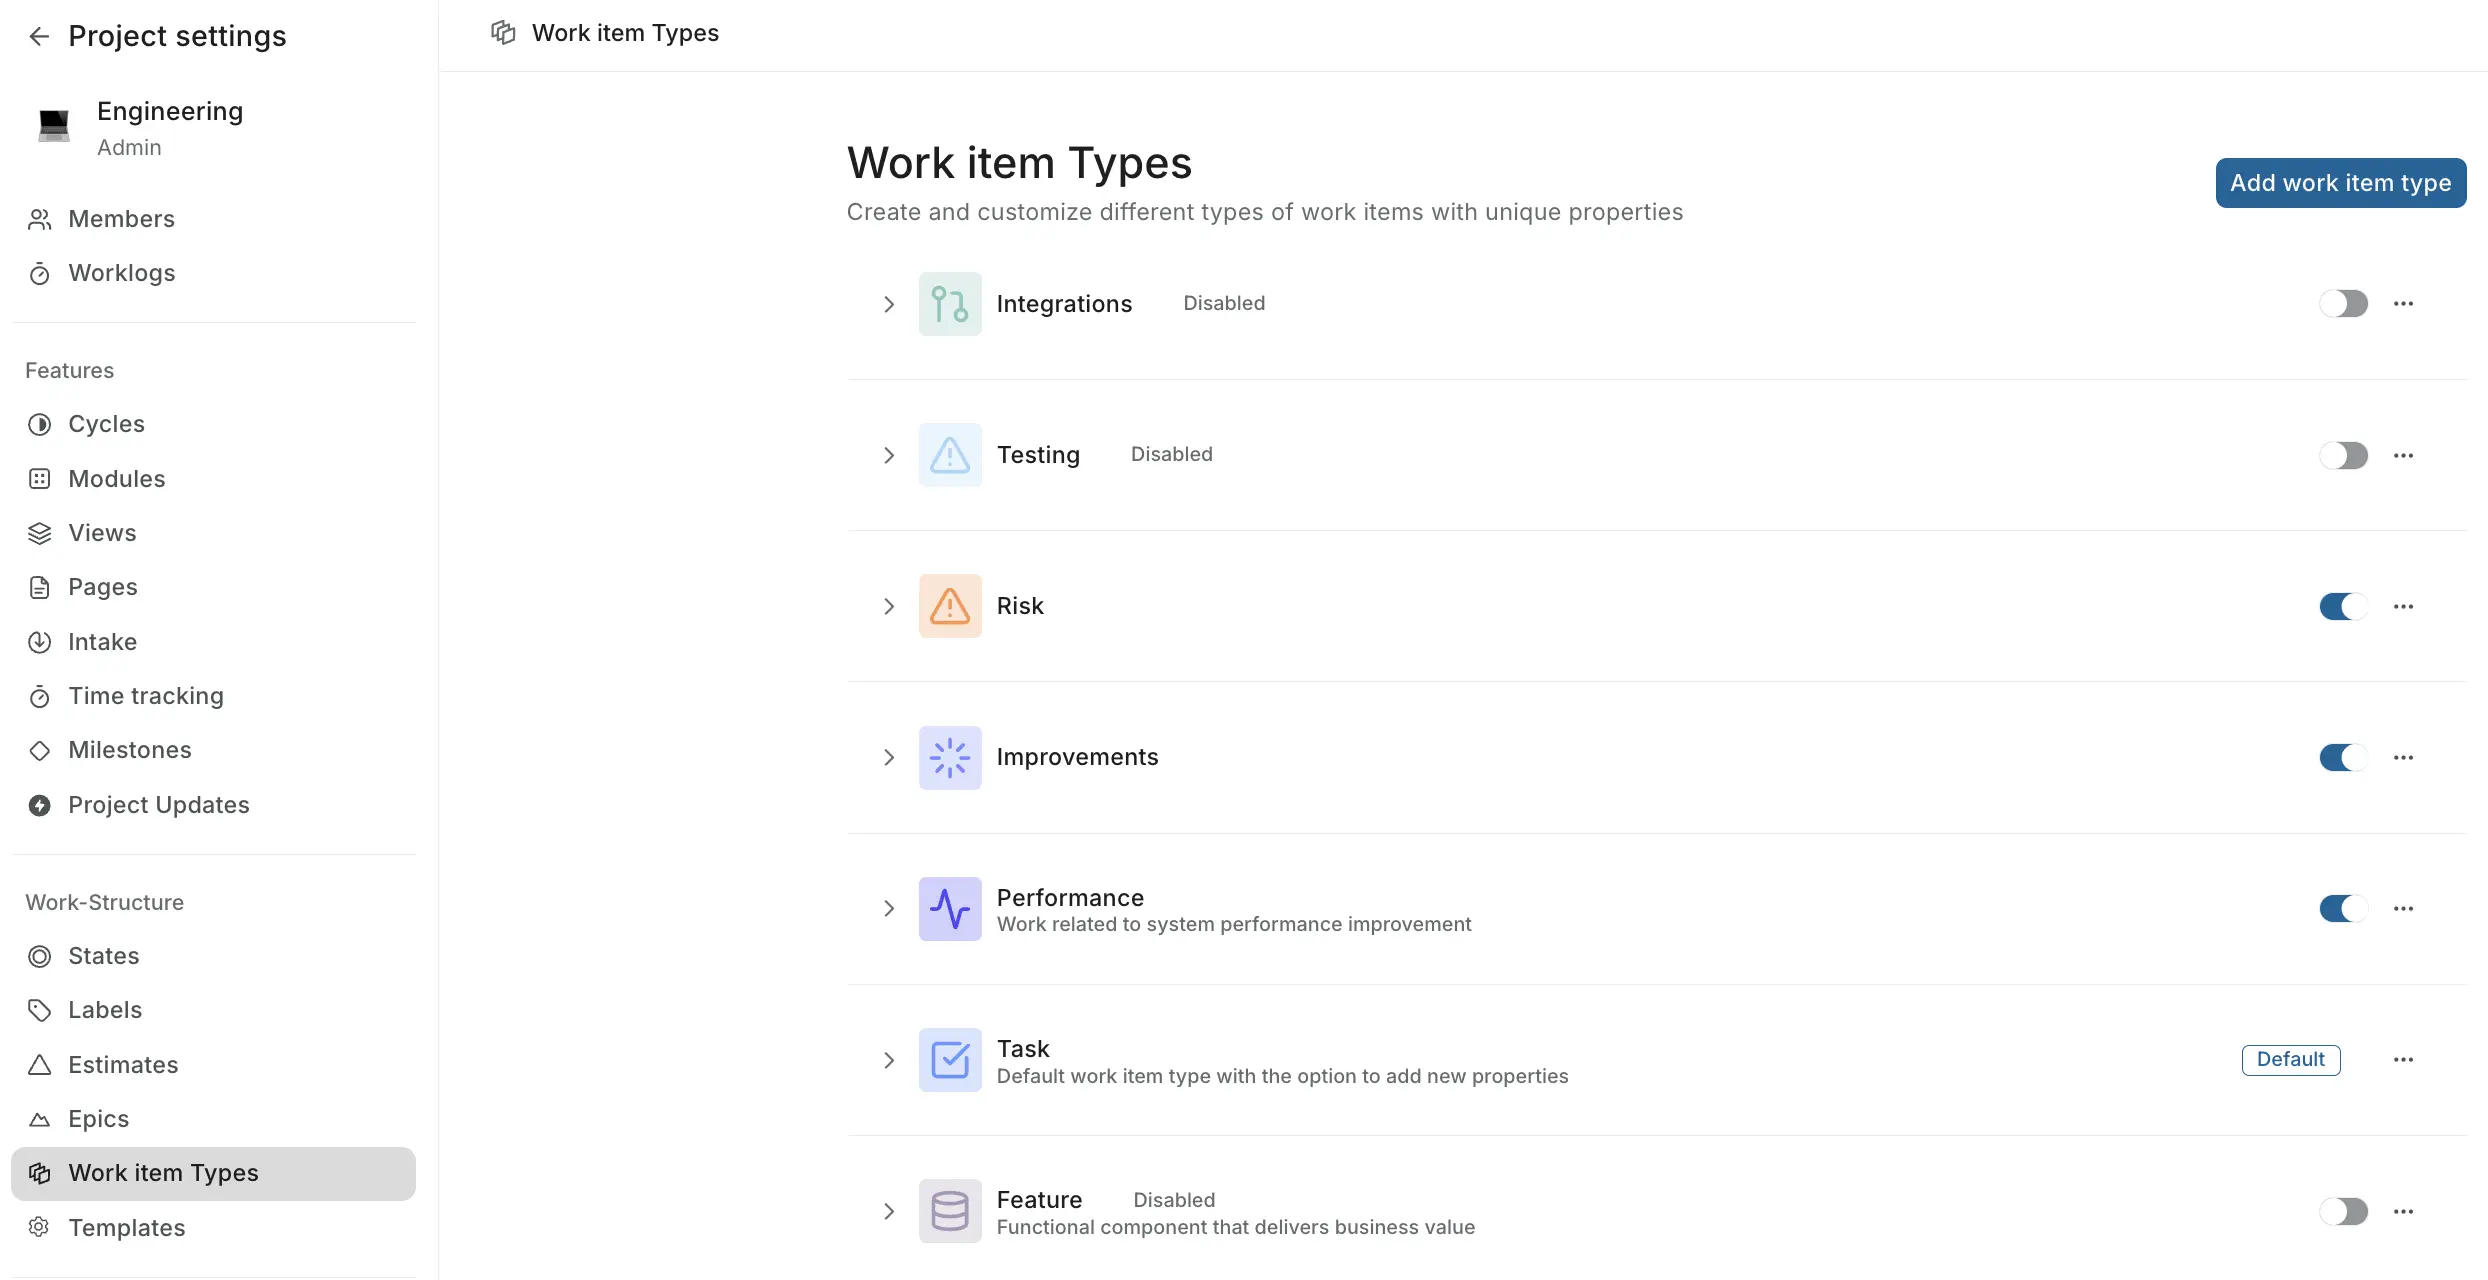
- Click the … icon next to your project name on the sidebar and click Settings.
- Select Work item Types in the settings panel. If Work Item Types haven't been enabled yet, you'll see the option to turn them on.
- Click Enable. A confirmation prompt reminds you that this cannot be reversed. Confirm to proceed.
- Two types appear in the list - the default Task type and an Epic type. You can now create additional types.
- Click the Add Work item Type button to create a new work item type.
- In the Create work item type modal, type name, and description, and choose a background color and an icon to represent the work item type. Click the Create work item type button.
- Switch on the toggle button to allow users to select the work item type when creating work items and sub-work items.
Examples of work item types
IT development teams
BugImprovementEpicStoryIT support teams
IncidentChangeService requestNew featureProduct management
Product launchesUser researchFeature developmentMarket analysisProduction units (automobile)
Production planning,Material procurement,Quality control,Inventory managementDesign agencies
Revision requestsDesign draftingClient presentationQuality assurance
Add custom properties
Role: Project Admins
You can add custom properties to all your work item types.
Under the work item type, click Add New Property to create custom fields.
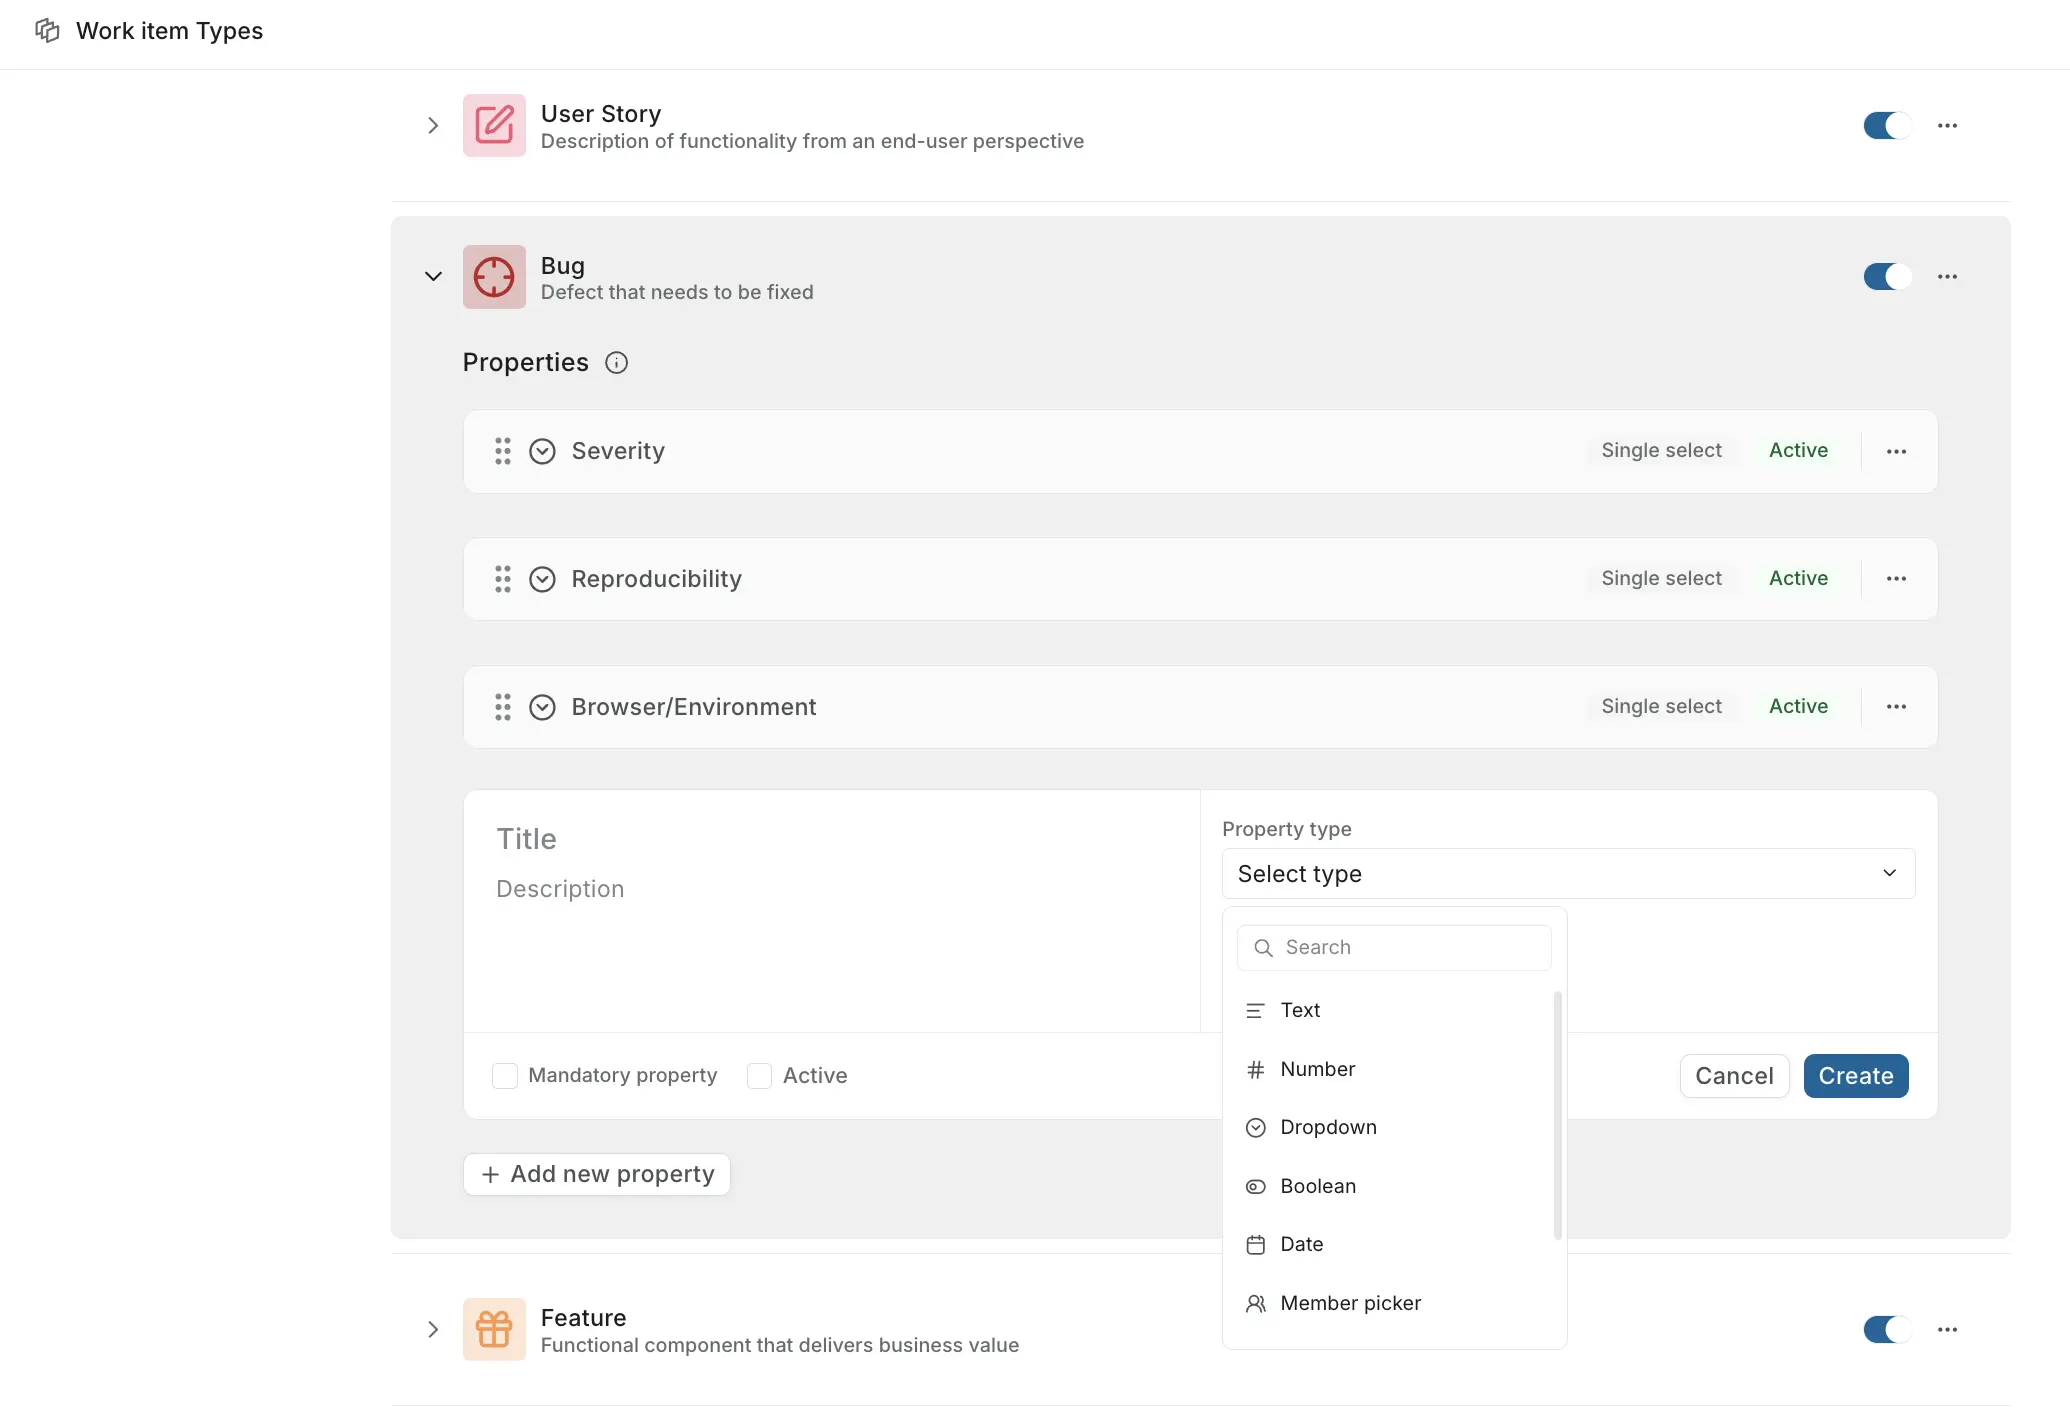
Specify values for Title, Description and Property type of the new property.
Select the Mandatory property checkbox if it's a required field. Select the Active checkbox to make the property visible in work items.
Click Create to add the property to the work item type.
WARNING
Before you delete properties, switch off the Active toggle button to avoid data loss.
Property types
Text
A freeform text field. When you add a text property, you choose one of three formats:
- Single line: A compact input for short values like names, codes, or labels.
- Paragraph: A multi-line input for longer freeform content.
- Read-only: A fixed text display. You enter the text when setting up the property, and members see it on every work item but cannot edit it. Read-only text properties cannot be marked as mandatory.
Number
A numeric field that accepts decimal values. You can optionally set a default value that pre-fills when a work item is created.
Dropdown
A selection field backed by a list of options you define. When setting up the property, add your options under Add options. Each option can have a name and an icon.
Choose Single select to let members pick one option at a time, or Multi select to allow multiple selections.
Boolean
A true/false toggle. The default state is false. Because it already represents a complete two-state answer, boolean properties cannot be marked as mandatory.
Date
A date picker field. You choose a display format for dates across this property:
Jan 15, 202515/01/202501/15/20252025/01/15
The format you pick applies consistently to all work items using this property.
Rich text Business
A full document editor field. Unlike a plain text property, rich text supports formatting: headings, lists, code blocks, inline code, bold, italic, and embedded images. Each work item stores its own content for the field, and that content is versioned and searchable.
Member picker
A people-selection field that lists all members of the project. Choose Single select to allow one member, or Multi select to allow several.
Members selected through a member picker property are automatically added as subscribers to that work item, so they receive notifications for updates, comments, and status changes.
Release picker Business
A field for linking a work item to one or more releases in the project. Supports multi-select.
URL
A field for a single URL. Members enter a link to an external resource, like a design file, a document, or a ticket in another tool, and it renders as a clickable link on the work item.
Cascading property
A cascading property is a set of linked dropdowns, where each choice narrows the options in the next one. For example, a Location property could have Country, State, and City levels. Once a member picks a country, the State dropdown only shows states in that country.
To create one, choose Cascading as the property type.
Levels. A cascading property has between two and four levels, such as Country, State, and City. When you create the property, name each level. Plane starts with two levels named Level 1 and Level 2. Click Add level to add more. Level names can be up to 100 characters. Later, use Manage levels to rename levels, add levels at the bottom, or delete them. You can't reorder levels.
Options. After you create the property, Plane opens Add cascading options. Add the options for the first level, then add options under each one for the next level. Each option belongs to one option on the level above it, and two options under the same parent can't have the same name. Click Skip to add options later with Manage options.
Sub-level labels. An option can rename the next dropdown for its own branch. For example, under India the next dropdown could be called State, and under Canada it could be called Province. Filters and table columns always use the level name.
Mandatory levels. You don't make a cascading property mandatory as a whole. Instead, turn on Mandatory for individual levels. Making a level mandatory also makes every level above it mandatory, so if City is mandatory, Country and State are too. A mandatory level only needs a value when the option above it has sub-options. If a member doesn't fill in every mandatory level, Plane doesn't save their selection.
Removing options and levels. If you remove options that work items already use, Plane asks you to type Confirm. It then clears those values from the work items and adds them to each work item's description, so no data is lost. Deleting a level also deletes every level below it and all their options, and the values move into the description the same way. You can't undo either change.
Cascading properties aren't available on draft work items.
Use work item types
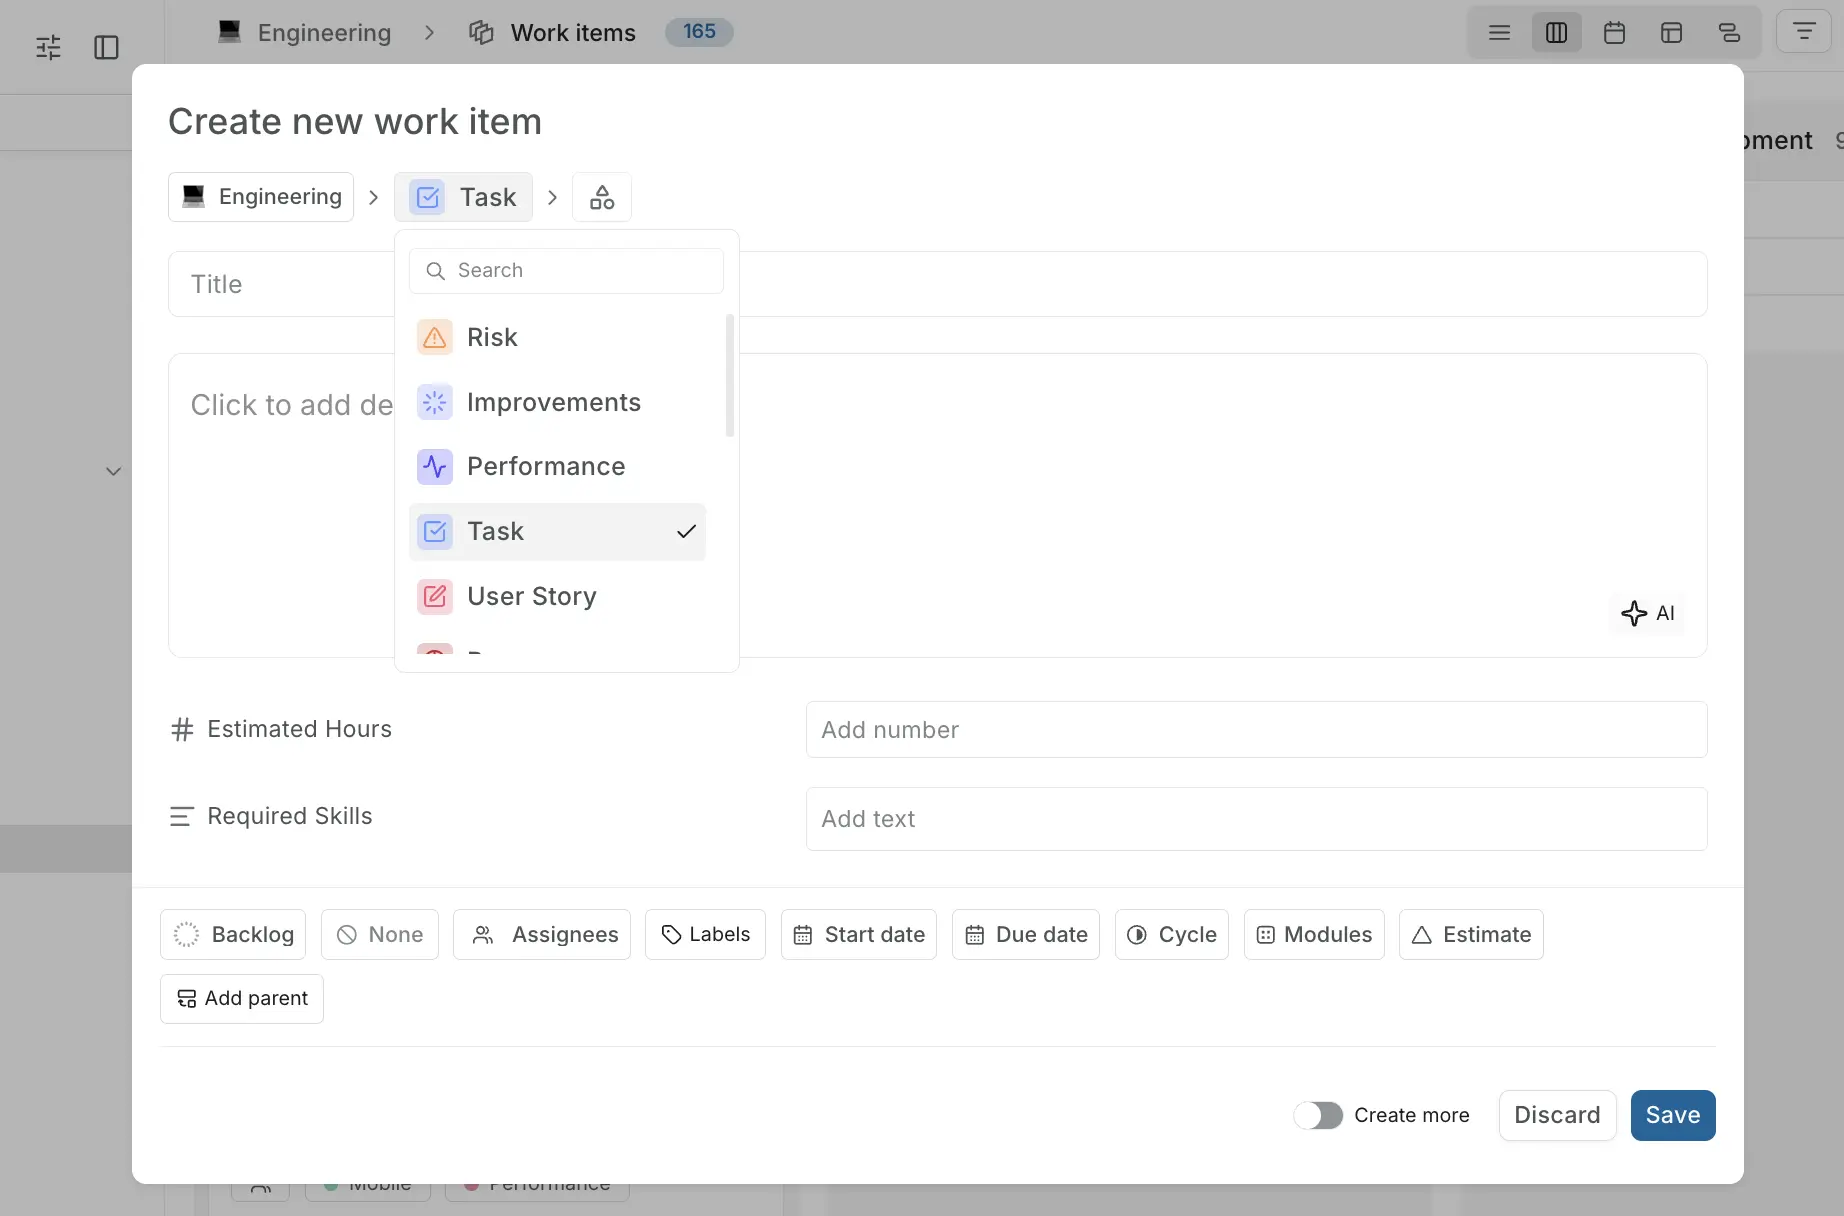
Once the project Admin sets up the work item types any project member can use them when creating work items or sub-work items.
In the Create new work item modal, the user can choose the desired work item type from the list at the top left corner. By default, the work item type
Taskis selected displaying both system-defined and custom properties.Changing the work item type will update the modal to display the relevant properties for that type.
When a member picker property is filled in, the selected members are automatically subscribed to the work item. This means reviewers, stakeholders, or anyone added through a member picker stay informed without needing to be manually subscribed.
The system ensures that all properties marked as mandatory are filled before creating the work item.
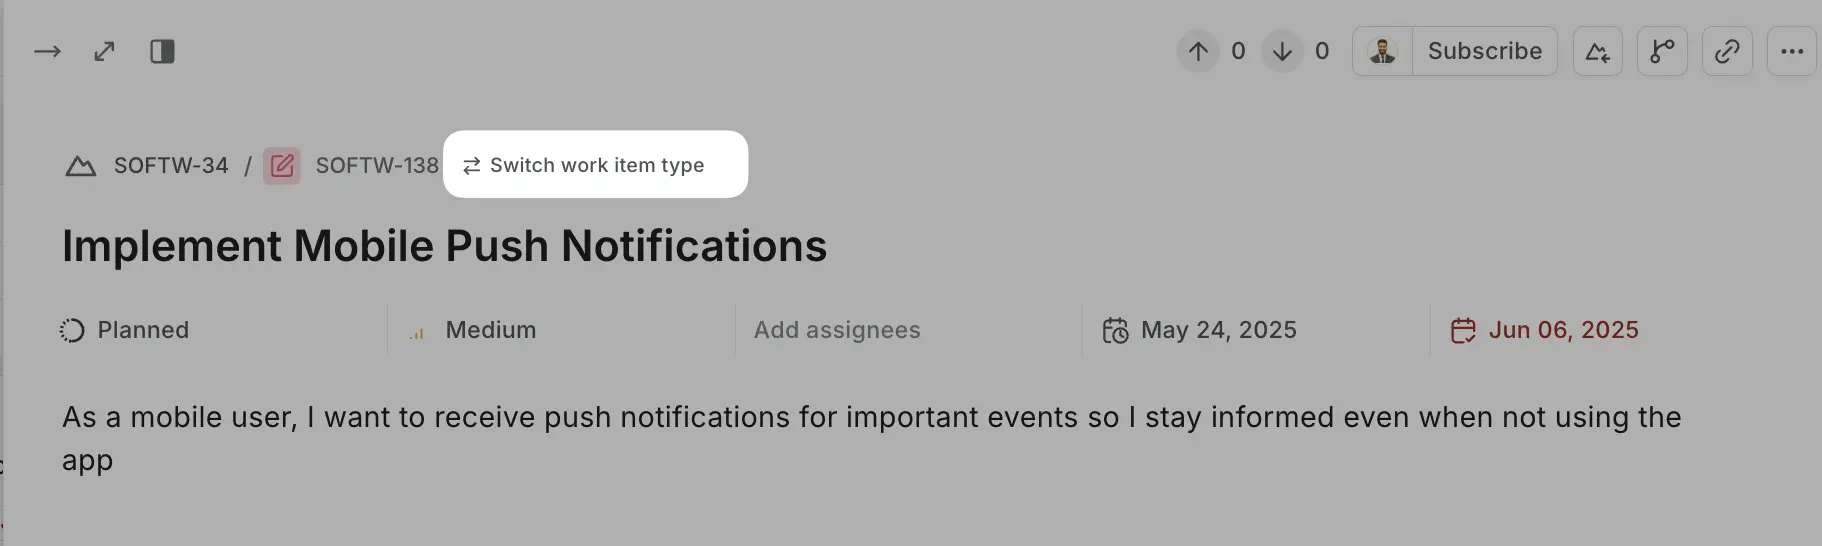
When viewing work items, the work item type is displayed with an icon near the title for easy identification. Any custom properties added will also appear in the list of properties, and changes to these values are tracked in the work item's activity trail.
Switch work item types
You can easily switch the work item's type at any time. Just follow these steps:
Open the work item you’d like to update.
Hover over to the right of the work item ID and click Switch work item type. Alternatively, you can click Edit from the work item's ellipsis (•••) menu to open the Update work item modal directly.
Choose the new work item type from the dropdown next to your project name.
Click Update to save your changes.
Plane asks Change work item type? Click Change type to confirm.
When you change the type, custom property values that only exist on the old type are removed from their fields and added to the work item's description as text, so the data isn't lost. You can't undo the change.
If your workspace has hierarchy levels, you can only switch to a type that fits the work item's current parent and sub-work items.
INFO
You can't change work item types in bulk. Switch each work item's type from the work item itself.
Set the default work item type
The default work item type is pre-selected whenever someone creates a new work item. Initially this is set to the built-in Task type, but you can change it to any active work item type.
- Navigate to Project Settings → Work item Types.
- Click the … menu next to the work item type you want to make the default.
- Select Set as default.
The selected type now shows a Default badge and is automatically pre-selected in the Create new work item modal. You can change the default at any time by repeating these steps for a different type.
Edit or delete work item types
To modify an existing work item type, click the … menu next to it and select Edit. You can update the name, description, icon, and background color.
To remove a work item type, click the … menu and select Delete. Existing work items of that type are not deleted — they retain the type until individually changed.
Disable work item types
Disabling a type hides it from the type selector when creating new work items. Existing work items of that type are not affected.
- Go to Project Settings → Work item Types.
- Find the type you want to pause.
- Toggle off the Active switch next to it.
To re-enable, toggle it back on.
INFO
The default type cannot be disabled.